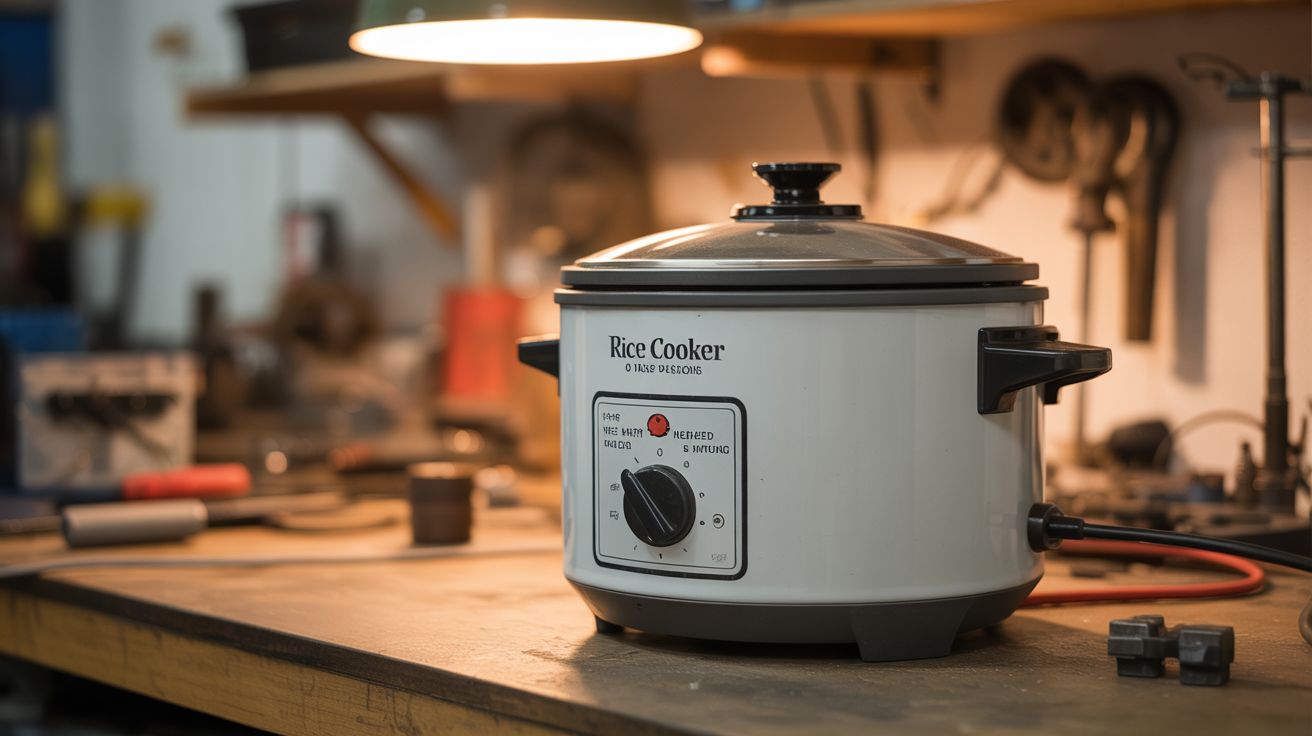
#304 — Rice Cooker Electroplating Station
The "keep warm" button is the most underrated feature in metalworking.
Ratings
🧪 What Is It?
Electroplating is the process of depositing a thin layer of metal onto an object using electricity. Submerge the object (cathode) and a sacrificial piece of the plating metal (anode) in a chemical solution, run DC current between them, and metal ions migrate from the anode through the solution and bond to the cathode atom by atom. It's how chrome bumpers get chromed, how gold jewelry gets its surface layer, and how circuit board traces get their copper. The process is straightforward chemistry, but there's a catch: temperature matters enormously. Most plating solutions work best between 120–140°F. Too cold and the deposition is slow, grainy, and poorly adhered. Too hot and the solution degrades, gases off, and produces dull or burned deposits.
Professional plating shops use heated tanks with thermostatic controllers — essentially large, expensive water baths that hold precise temperatures. A rice cooker is a heated tank with a thermostatic controller. The "keep warm" setting on most rice cookers holds the inner pot at 140–170°F. The "cook" setting brings it to 212°F. Between the two settings and the natural thermal mass of the solution, you can dial in and hold any temperature in the electroplating sweet spot almost indefinitely. The non-stick inner pot is chemically inert and won't react with acidic plating solutions. The built-in thermostat prevents runaway heating. The form factor is perfect: deep enough to submerge small parts, wide enough for a comfortable working area, and the rim holds your anode and cathode wires naturally.
Add a DC power supply (a benchtop unit or a repurposed laptop charger), some copper or nickel anode material, and a bottle of plating solution, and you're running the same fundamental process as a professional plating line. The results on small parts — jewelry, 3D prints, costume hardware, electronics enclosures — are genuinely excellent. Copper plating produces a warm, bright finish that patinas beautifully. Nickel plating gives a hard, corrosion-resistant surface. Gold plating over a nickel base coat produces jewelry-quality results that fool everyone who sees them. The total setup cost is under $50. A comparable benchtop plating kit from a supplier starts at $120 and still doesn't include temperature control.
🧰 Ingredients
- Rice cooker — standard 5–10 cup model with "cook" and "keep warm" settings (thrift store, $4–8)
- DC power supply — adjustable 0–30V, 0–5A benchtop supply is ideal; a 12V/2A laptop charger works for basic copper plating (electronics supplier, $25–40 for adjustable; $5 for laptop charger at thrift store)
- Copper anode — pure copper sheet, bar, or heavy copper wire; avoid brass or bronze (zinc and tin contaminate the bath) (hardware store, metals supplier, $5–8)
- Nickel anode — pure nickel strip or bar for nickel plating (specialty metals supplier, online, $8–12)
- Copper plating solution — copper sulfate + sulfuric acid; buy premixed or make from copper sulfate crystals and distilled white vinegar for a simpler acid copper bath (chemistry supplier, garden store for CuSO4, $5–10)
- Nickel plating solution — nickel sulfate + nickel chloride + boric acid (Watts bath formula); premixed kits are easiest (plating supplier, online, $15–25)
- Distilled water — for mixing solutions; tap water contains chlorine and minerals that contaminate baths (grocery store, $1)
- Alligator clip leads — to connect power supply to anode and cathode (electronics supplier, $3)
- Copper wire — bare solid copper, 14–18 gauge, for hanging parts in the bath (hardware store, $3)
- Conductive paint or graphite spray — for plating non-conductive objects like 3D prints (art supply, hardware store, $5–8)
- Sandpaper, 320–600 grit — for surface preparation (hardware store, $3)
- Degreaser — acetone, isopropyl alcohol, or TSP for pre-plating cleaning (hardware store, $3–5)
- Infrared thermometer — to verify bath temperature (hardware store, $12–15)
- Nitrile gloves — plating solutions stain skin and some are mildly corrosive (pharmacy, $5)
- Safety glasses — copper sulfate solution in your eyes will ruin your afternoon (hardware store, $3)
🔨 Build Steps
-
Set up the rice cooker as a heated bath. Remove any accessories (steamer basket, measuring cup). The bare inner pot is your plating tank. Fill it about 2/3 full with your plating solution. Set the cooker to "keep warm" and let the solution come to temperature — check with the infrared thermometer every few minutes. Most rice cookers on "keep warm" stabilize at 140–165°F, which is ideal for copper and nickel plating. If your cooker runs hot (above 160°F on warm), you can cycle the power — 10 minutes on, 5 off — or put a folded towel under the inner pot as a thermal buffer.
-
Prepare the plating solution. For a basic acid copper bath: dissolve 200g of copper sulfate pentahydrate (the blue crystals sold as root killer at hardware stores — check that it's pure CuSO4 with no additives) in 1 liter of distilled water. Add 30ml of sulfuric acid (available as battery acid from auto parts stores, typically 35% concentration) or substitute 100ml of distilled white vinegar for a gentler but slower bath. Stir until fully dissolved. The solution should be clear blue with no floating particles. For nickel plating, use a premixed Watts bath kit for your first attempt — mixing nickel baths from raw chemicals requires precise ratios and pH adjustment.
-
Prepare the anode. Cut your copper sheet or bar to roughly the same surface area as the part you're plating, or slightly larger. A larger anode relative to the cathode produces more even deposition. Clean the anode with sandpaper and degrease it with acetone. Attach an alligator clip lead to the anode and connect the other end to the positive (+) terminal of your DC power supply. Hang the anode in the solution from the rim of the rice cooker pot so it's submerged but not touching the bottom.
-
Prepare the workpiece (cathode). Surface preparation is where plating jobs succeed or fail. The part must be surgically clean — any oil, oxide, fingerprint, or contamination will cause the plating to blister, peel, or refuse to deposit. Sand the part with 320 grit, then 600 grit. Wipe down with acetone or isopropyl alcohol. Rinse with distilled water. From this point on, handle the part only with clean gloves — one fingerprint and you'll see a perfect fingerprint-shaped void in the plating.
-
Make non-conductive parts conductive. 3D prints, plastic models, wood, and ceramics need a conductive surface layer before electroplating works. Options: brush on conductive silver or copper paint (available from electronics suppliers), spray with graphite-based conductive coating, or apply conductive copper tape to the surface. The coating must be continuous and well-adhered — any gaps will show as unplated spots. For complex geometry, conductive paint brushed into every crevice works best. Let it dry completely and verify continuity with a multimeter before plating.
-
Wire up the circuit. Connect the anode (plating metal) to the positive (+) terminal of the power supply. Connect the workpiece to the negative (-) terminal. Getting this backwards deposits metal from your workpiece onto the anode — you'll dissolve the part you're trying to plate. If you mix it up, you'll notice the workpiece getting darker and thinner instead of brighter and thicker. Polarity matters. Double-check it. Then check it again.
-
Set voltage and current. For copper plating, start at 1–3V and 0.5–1A. Higher voltage means faster deposition but rougher, more porous results. Lower voltage means slower but smoother, more adherent plating. A good rule: start low, plate for 10 minutes, inspect, then adjust. If the deposit looks dark or powdery, voltage is too high. If nothing seems to be happening after 5 minutes, increase voltage slightly. Current density (amps per square inch of cathode surface) is the real control variable — aim for 10–30 ASF for copper. You don't need to calculate this precisely; just watch the results and adjust.
-
Plate the part. Lower the workpiece into the heated solution, positioned parallel to and 2–4 inches from the anode. Turn on the power supply. Small bubbles forming on the cathode surface are normal — that's hydrogen gas from the electrochemical reaction. Gently agitate the solution every few minutes by swirling the pot or moving the part — agitation prevents concentration gradients from building up near the cathode surface, which cause uneven plating. Copper plating at moderate current typically deposits about 0.001" per hour. For a nice decorative finish, 20–40 minutes is usually enough. For a structural copper coat on a 3D print, plate for 2–4 hours.
-
Rinse and inspect. Remove the part from the bath and rinse immediately under running distilled water (tap water leaves mineral spots on fresh plating). Pat dry with a clean lint-free cloth. Inspect the surface — a good copper plate is smooth, bright salmon-pink, and uniform. Dull spots usually mean the surface wasn't clean enough in that area. Rough or grainy texture means voltage was too high or the solution is contaminated with particles. For a mirror finish, buff with polishing compound on a soft cloth or rotary tool with a cotton wheel.
-
Layer up for advanced finishes. The real magic happens with multi-layer plating. Copper plate a part first (it adheres well to most substrates and builds thickness cheaply), then switch to the nickel bath for a hard, corrosion-resistant second layer, then flash-plate in a gold solution for a jewelry-quality finish. Each layer is a separate bath — rinse the part thoroughly between baths to avoid cross-contamination. A copper-nickel-gold stack on a $2 3D print is visually and tactilely indistinguishable from machined and plated brass. People will pick it up, feel the weight of the copper, see the gold surface, and refuse to believe it started as plastic.
⚠️ Safety Notes
- Copper sulfate solution is toxic if ingested and irritating to skin and eyes. Wear nitrile gloves and safety glasses when handling. If solution contacts skin, rinse with water for 5 minutes. If splashed in eyes, flush with water for 15 minutes and seek medical attention.
- Sulfuric acid (battery acid), even diluted, causes chemical burns. Add acid to water, never water to acid — adding water to concentrated acid causes violent spattering. Wear gloves and glasses when mixing.
- Electroplating produces small amounts of hydrogen gas at the cathode. In a rice cooker with an open top, this dissipates harmlessly. Do not seal the cooker lid during plating — hydrogen accumulation in a closed vessel is an explosion risk.
- Never use the rice cooker for food again after plating. Heavy metal salts (copper, nickel) are toxic and will contaminate any food surface they contact. Label the cooker permanently.
- Nickel compounds are known carcinogens with repeated skin exposure. Wear gloves when handling nickel solutions and anodes. If you develop a rash from nickel exposure, switch to copper-only plating — nickel allergy is common (about 10% of the population).
- Dispose of spent plating solutions at a household hazardous waste facility. Do not pour them down the drain — dissolved copper is toxic to aquatic life at very low concentrations.