#266 — Galvanometer Laser Light Show
Two mirrors on galvanometers steer a laser fast enough to draw shapes on walls. Concert laser show for $20.
Ratings
🧪 What Is It?
Every concert laser show you have ever seen works the same way: a laser beam bounces off two tiny mirrors mounted on galvanometers — one for X-axis deflection, one for Y-axis. The galvos tilt their mirrors thousands of times per second, steering the beam so fast that persistence of vision turns a single moving dot into shapes, text, and animations drawn in light on any surface. Professional galvo scanners cost hundreds of dollars per pair. But the same mirror-on-a-motor mechanism exists inside barcode scanners, and the same electromagnetic deflection principle can be replicated with hard drive voice coil actuators.
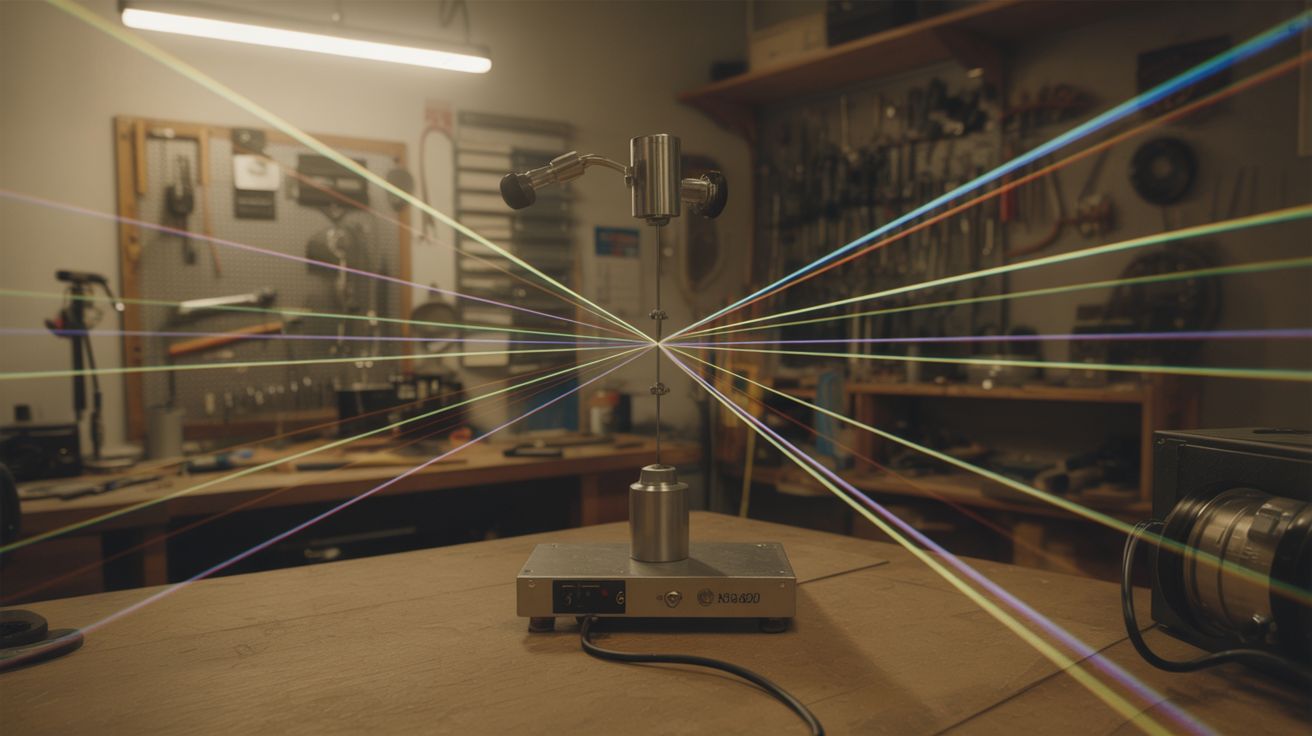
The concept is straightforward: laser hits mirror 1 (X-axis), bounces to mirror 2 (Y-axis), bounces to the projection surface. An Arduino generates control signals that determine the angle of each mirror. Change both angles simultaneously and the dot moves to any X,Y position on the surface. Change them fast enough and the dot traces out continuous shapes — circles, squares, text, abstract patterns. Hook up audio input and the shapes pulse, morph, and breathe with the music. Add fog and the beams become visible lines cutting through the air — that is when it goes from impressive to jaw-dropping.
This is one of those builds where the result is wildly disproportionate to the cost. A laser drawing shapes on a foggy wall in a dark room looks like a $50,000 production. The fact that it runs on an Arduino and parts from a dead barcode scanner makes it even better.
🧰 Ingredients
- Laser module — green (532nm) is most visible to the eye, 5-50mW (electronics supplier, $5-15)
- 2 galvanometer scanners — salvage from barcode scanners, or build from hard drive voice coil actuators + small mirrors (e-waste bin, electronics supplier, $3-10 each)
- Arduino Uno or Nano (electronics supplier, $5-15)
- 2 driver circuits — H-bridge modules (L298N) or op-amp driver circuits for the galvo coils (electronics supplier, $3-5 each)
- Small first-surface mirrors — preferred for clean reflections without ghosting; craft mirrors work in a pinch (craft store, salvage from makeup compact, hard drive platter, $1-2)
- 12V power supply — 2A+ for the galvo drivers (old laptop charger, PC power supply, free)
- Mounting hardware — small angle brackets, screws, hot glue (hardware store, junk drawer, $2)
- Fog machine or incense — to make beams visible in air (party store $15; or incense $3)
- Laser safety goggles — rated for your laser wavelength (online, $10-15)
- Optional: audio jack + amplifier module — for music-reactive mode (electronics supplier, $2)
- Optional: DAC module (MCP4725) — for smoother analog output than PWM (electronics supplier, $2)
🔨 Build Steps
-
Salvage or build the galvo scanners. The ideal source is a dead barcode scanner from a retail checkout counter — these contain matched galvo pairs designed specifically for laser beam steering. Disassemble the scanner and extract the galvo assembly with its mirrors intact if possible. Alternatively, build your own from hard drive voice coils: extract the actuator arm assembly from a dead hard drive (the arm that swings the read head across the platter). Glue a small mirror to the end of the arm. The voice coil swings the arm proportionally to applied current — the exact same principle as a speaker cone. You need two assemblies, one for each axis.
-
Mount the galvos at 90 degrees. Secure the X-axis galvo so its mirror faces the incoming laser beam. Mount the Y-axis galvo so its mirror catches the reflected beam from the X mirror. The beam path goes: laser -> X mirror -> Y mirror -> projection wall. The X galvo steers the beam left and right, the Y galvo steers it up and down. Get the alignment right before bolting anything down — adjust until the beam hits the Y mirror cleanly across the full X deflection range, and the Y mirror sends the beam to a consistent rectangular area on the target surface.
-
Wire the driver circuits. Each galvo coil needs a driver that can push current in both directions to deflect the mirror both ways from center. An H-bridge module (L298N) works well for this — it can drive the coil forward and reverse with PWM speed control. Connect the X driver input to one Arduino PWM output pin, Y driver to another. If using hard drive voice coils, they are low-impedance (typically 5-20 ohms), so start with low voltage (5V) and increase carefully while watching for coil overheating. Current flowing through a voice coil generates heat proportional to I-squared-R — too much current will melt the insulation.
-
Test basic deflection. Before writing pattern code, verify that each galvo responds to the driver signal. Send a slow sine wave to the X galvo and watch the dot sweep left and right on the wall. Do the same for Y. If the dot barely moves, increase the signal amplitude or driver voltage. If it slams to one side and sticks, reduce the amplitude. You want smooth, proportional deflection across the full range without hitting the mechanical stops.
-
Program basic shapes. Write Arduino code that outputs X and Y coordinate values as PWM signals. Start with a circle: X = sin(t), Y = cos(t), where t increments continuously in a loop. Map the sine/cosine output (-1 to 1) to the PWM range (0 to 255). For smoother output, use a DAC module (MCP4725) instead of PWM — the analog output eliminates the high-frequency noise that PWM introduces into galvo coils. Adjust the loop speed until the circle appears as a solid line due to persistence of vision. The circle needs to complete at least 30 times per second to look solid.
-
Add more patterns. Once a circle works, the creative possibilities open up. Squares: alternate between fixed X/Y positions at the corners with rapid transitions between them. Lissajous curves: use different frequencies for X and Y (X = sin(2t), Y = sin(3t)) for mesmerizing interleaved loops. Stars and spirals: polar coordinate equations mapped to Cartesian X/Y. Text: look up ILDA standard laser font coordinate tables online — each letter is a series of X,Y waypoints. Store multiple patterns in the Arduino and cycle through them with a button press.
-
Add blanking control. When drawing shapes with separate parts (letters in a word, disconnected shapes), you need to turn the laser off while the beam moves between elements. Connect a digital output pin to the laser module enable/TTL input, or drive a transistor that switches the laser power. Set it LOW during transit moves and HIGH when drawing. This eliminates the visible connecting lines between separate shapes. Without blanking, text looks like text connected by glowing threads. With blanking, it looks clean and professional.
-
Add music reactivity (optional). Feed audio from a line-level source into an Arduino analog input through a voltage divider. Read the signal amplitude and use it to modulate visual parameters in real time: bass amplitude controls pattern scale, mids control rotation speed, highs control shape complexity or number of vertices. For more sophisticated audio response, use a Fast Fourier Transform library to separate frequency bands and map each to a different visual parameter. The effect is hypnotic — patterns that breathe and pulse in perfect sync with the music.
-
Add fog and kill the lights. Turn off every light in the room. Fire up a fog machine or burn several sticks of incense. Run your patterns. The laser beams become visible as bright, sharp lines cutting through the suspended particles. Green lasers at 532nm are the most visible to the human eye and produce the most dramatic effect. In a dark room with moderate fog density, this looks absolutely professional — concert-venue quality from $20 in parts.
-
Add safety interlocks. Professional laser shows include scan-fail safety: if the galvos stop moving (power loss, code crash, hardware failure), the laser turns off automatically. Without this, a stationary beam concentrates all the laser energy on one point — bad for surfaces and dangerous if the point happens to be at eye level. Implement a watchdog timer in your code that disables the laser if the scan loop stalls. On the hardware side, a simple RC circuit on the galvo drive signal that detects lack of activity and cuts laser power provides a backup safety layer.
⚠️ Safety Notes
- Laser light shows use beams that can cause permanent eye damage. Never allow the beam to sweep across audience eye level. Aim all projections at walls, ceilings, or elevated surfaces well above standing head height. Position the projector so no one can walk between it and the projection surface at beam height.
- Green laser modules above 5mW are Class IIIb and can cause eye damage from even brief direct exposure or specular reflections off shiny surfaces. Wear laser safety goggles rated for your specific wavelength during alignment and testing. Remove goggles only when the show is running and you are safely behind the projector.
- Fog machines can trigger smoke detectors and fire sprinklers. Disable or cover nearby detectors during use and re-enable them immediately afterward.
- Galvo mirrors oscillating at high speed can shatter if they are thin regular glass. First-surface mirrors (reflective coating on the front face, no glass substrate) are safest. If using glass mirrors, keep them small and test behind a shield initially.
- Never point the output toward windows, roads, or flight paths. Interfering with aircraft using a laser is a federal crime in many countries and genuinely endangers lives.