#016 — Infinity Mirror Table
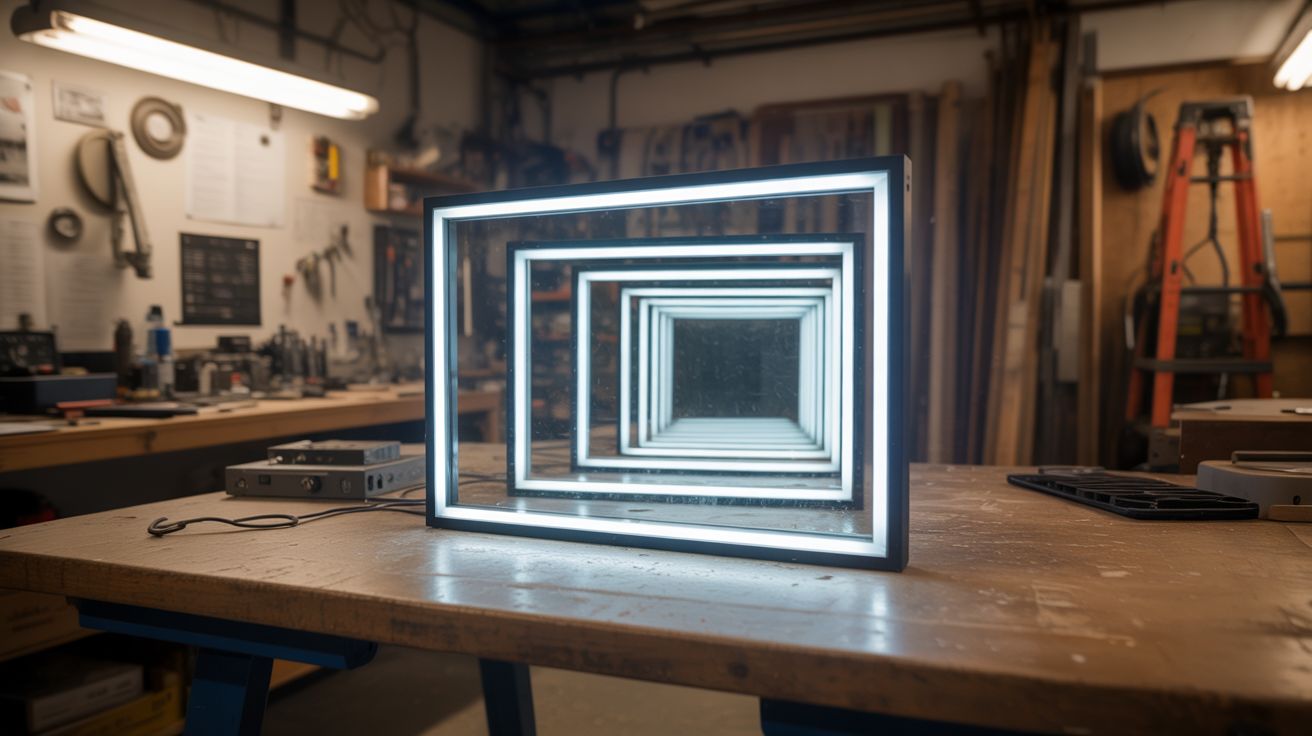
An LED strip sandwiched between a regular mirror and a one-way mirror creates the illusion of an infinitely deep tunnel of light.
Ratings
🧪 What Is It?
An infinity mirror exploits the way light bounces between two parallel mirrors. One mirror is a regular mirror (fully reflective), and the other is a one-way mirror (partially reflective, partially transparent). LED strips between the two mirrors create light that bounces back and forth, each reflection appearing slightly dimmer and deeper. Looking through the one-way mirror side, you see what appears to be an endless tunnel of lights receding into infinity.
Built into a coffee table, this becomes a piece of furniture that stops every guest in their tracks. The LED strip color and pattern can be controlled with a simple remote, changing the tunnel from warm white to rainbow to pulsing effects. In a dark room, it looks like a portal to another dimension sitting in your living room.
🧰 Ingredients
- One-way mirror film or one-way acrylic mirror sheet (source: online or auto tint shop, ~$10-15)
- Regular mirror, sized to your table top (source: thrift store or dollar store, ~$5-10)
- Addressable LED strip (WS2812B or similar) (source: online, ~$8-12)
- Glass or clear acrylic sheet for the top (if using mirror film) (source: hardware store, ~$5-10)
- Wood frame material for the table structure (source: scrap wood or lumber, ~$10-15)
- Arduino Nano or LED controller with remote (source: online, ~$5)
- 5V power supply for LEDs (source: old phone charger or USB adapter, free-$5)
- Wood stain or paint for the frame (source: hardware store, ~$5)
🔨 Build Steps
-
Build the frame. Construct a shallow box frame — essentially a picture frame with depth. The depth (gap between mirrors) determines how far apart the reflections appear. 2-4 inches works well for a table. The frame holds the regular mirror on the bottom and the one-way mirror on top. Make it sturdy — it's also the table structure.
-
Install the regular mirror. Place the fully reflective mirror face-up in the bottom of the frame. This is the back mirror that bounces light upward.
-
Apply LED strips. Attach the LED strip around the inside perimeter of the frame, between where the two mirrors will sit. The LEDs should face inward so light enters the space between the mirrors. For the best effect, place the strip at the midpoint of the frame depth.
-
Prepare the one-way mirror. If using one-way mirror film, apply it to a clean glass or acrylic sheet following the film instructions (spray with soapy water, apply, squeegee out bubbles). The reflective side faces inward (toward the regular mirror). If using pre-made one-way acrylic, orient the reflective side down.
-
Test before final assembly. Temporarily place the one-way mirror on top, power up the LEDs, and look through the one-way mirror. You should see the infinity tunnel effect — repeating rings of light disappearing into apparent depth. If the reflections fade too quickly, your one-way mirror may be too transparent. If you can't see through it at all, the reflective side may be facing the wrong way.
-
Wire the controller. Connect the LED strip to your Arduino or LED controller. Program color patterns — solid colors, rainbow cycles, breathing effects, and music-reactive modes all look spectacular in the infinity mirror. Route the wires neatly through the frame with a small exit hole for the power cable.
-
Final assembly. Seal the one-way mirror into the top of the frame. Make sure it sits flush and level — any tilt will make the infinity tunnel curve, which is disorienting rather than cool. Secure with trim pieces or silicone adhesive.
-
Add legs or mount. Attach table legs, or integrate the infinity mirror panel into an existing table by cutting a hole in the tabletop and recessing the assembly. A wall-mounted version also works well as art.
⚠️ Safety Notes
[!WARNING] The table top is glass or acrylic. Don't place heavy objects or slam things down on it. Use a clear tempered glass panel if you want it to be functional as a table. Standard glass can shatter if stressed.
- LED strips can get warm. Ensure some ventilation in the frame (a few small holes on the underside) so heat can escape. Enclosed LED strips running at full brightness for hours can overheat and degrade.
🔗 See Also
- Fiber Optic Star Ceiling — another LED-based installation that transforms a room
- Pepper's Ghost Hologram — another optical illusion build using partially reflective surfaces