#172 — Schlieren Optics
A concave mirror and a razor edge let you literally see sound waves, heat currents, and air density changes that are normally invisible.
Ratings
🧪 What Is It?
Schlieren photography is an optical technique that makes invisible variations in air density visible to the naked eye (or a camera). Hot air rising from a candle, the shockwave from a hand clap, the density change from breathing out, helium leaking from a balloon — all of these bend light slightly as it passes through, and a Schlieren setup amplifies those tiny deflections into dramatic visual patterns.
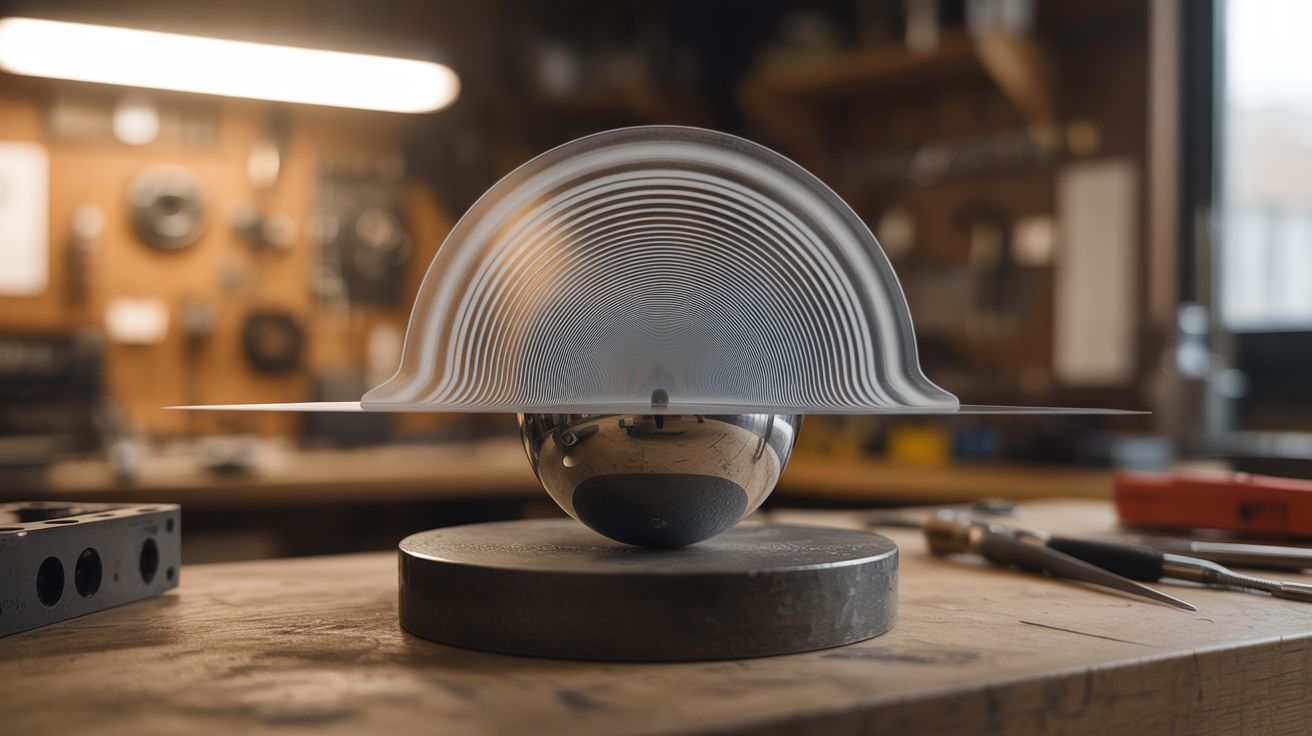
The setup uses a concave mirror, a point light source, and a razor blade or sharp edge positioned at the mirror's focal point. Light rays that pass through undisturbed air reach the focal point and are blocked by the razor edge. Light rays that get deflected by density gradients miss the razor edge and reach the camera/eye, revealing the disturbance as bright regions against a dark background. The result is breathtaking — you can literally watch sound waves propagate through air.
🧰 Ingredients
- Concave mirror — telescope mirror, shaving mirror, or parabolic reflector, 6-12 inches (source: thrift store, old telescope, satellite dish, or online, ~$15-30)
- Point light source — bright LED behind a pinhole, or fiber optic light (source: bright flashlight + foil with pinhole, ~$0)
- Razor blade or X-Acto knife blade (source: around the house)
- Camera with manual focus (phone works in a pinch) (source: already own)
- Optical bench or stable mounting surface (source: a table and some clamps, free)
- Various test subjects — candle, lighter, compressed air can, warm soldering iron (source: around the house)
- Black backdrop (source: black fabric or cardboard, ~$2)
🔨 Build Steps
-
Understand the optical layout. The concave mirror sits on one side. The point light source and the razor edge/camera sit together on the other side, at the mirror's center of curvature (twice the focal length). Light travels from the source to the mirror and reflects back to the focal point where the razor edge blocks it. Any density variation in the air between the source and the mirror deflects some light past the razor edge.
-
Set up the concave mirror. Mount the mirror securely on a stand, facing across the room. You need a clear path of at least 2x the focal length between the mirror and the source/camera side. For a mirror with 1-meter focal length, you'll need about 2 meters of clear space. Larger mirrors give you a bigger "viewing window" for Schlieren effects.
-
Create the point light source. Wrap a bright LED flashlight in aluminum foil and poke a tiny pinhole (~1mm) in the center. The smaller the pinhole, the sharper the Schlieren images but the dimmer the field. Alternatively, use the LED with a focusing lens. Position this at the mirror's center of curvature.
-
Find the focal point. Turn on the point source and adjust its position until the light reflected from the mirror converges to the smallest possible bright spot on the source side. This spot is at the center of curvature. Mark this position — it's where the razor edge and camera will go.
-
Position the razor blade. Mount a razor blade or sharp knife edge at the focal point of the reflected light, oriented to block approximately half of the returning light. When properly positioned, the field of view through the mirror will darken uniformly. This is the critical alignment step — patience here pays off enormously in image quality.
-
Set up the camera. Position your camera just behind the razor blade, focused on the mirror (or more precisely, on the plane of air in front of the mirror). The camera should see the full mirror face as a uniformly dim or half-bright disc. Manual focus is essential — autofocus will hunt and ruin the effect.
-
Test with a candle. Light a candle and place it in the optical path between the light source and the mirror (closer to the mirror is easier to see). Look through the camera — you should see the hot air rising from the candle as dramatic, flowing turbulence patterns. If you see nothing, fine-tune the razor blade position.
-
Explore invisible phenomena. Once the system is aligned, try: blowing through the field (your breath is visible), clapping near the mirror (sound waves become visible), spraying compressed air (the cold jet is dramatically visible), holding a warm soldering iron in the field (convection currents appear), or releasing helium (it rises visibly because it's less dense than air).
-
Capture video. Schlieren effects are most impressive in motion. Record video at the highest frame rate your camera supports. Slow-motion footage of sound waves or heat plumes is genuinely mesmerizing and shares incredibly well on social media.
⚠️ Safety Notes
[!WARNING] Razor blades are razor blades. Handle with care. Mount the blade securely so it can't fall or be bumped into. Keep fingers well clear of the edge during alignment.
- Open flames and compressed gases. When using candles or gas cans as test subjects, keep them away from other flammable materials and ensure ventilation. Don't spray compressed gas at the flame — the propellant in many compressed gas cans is flammable.
🔗 See Also
- Ultrasonic Levitator — another way to interact with invisible pressure waves in air
- Camera Obscura Room — another optics project that reveals hidden visual phenomena