#039 — Vacuum Chamber
A fridge compressor run backward becomes a vacuum pump. Add a bell jar and suddenly you're doing experiments that normally require a university lab.
Ratings
🧪 What Is It?
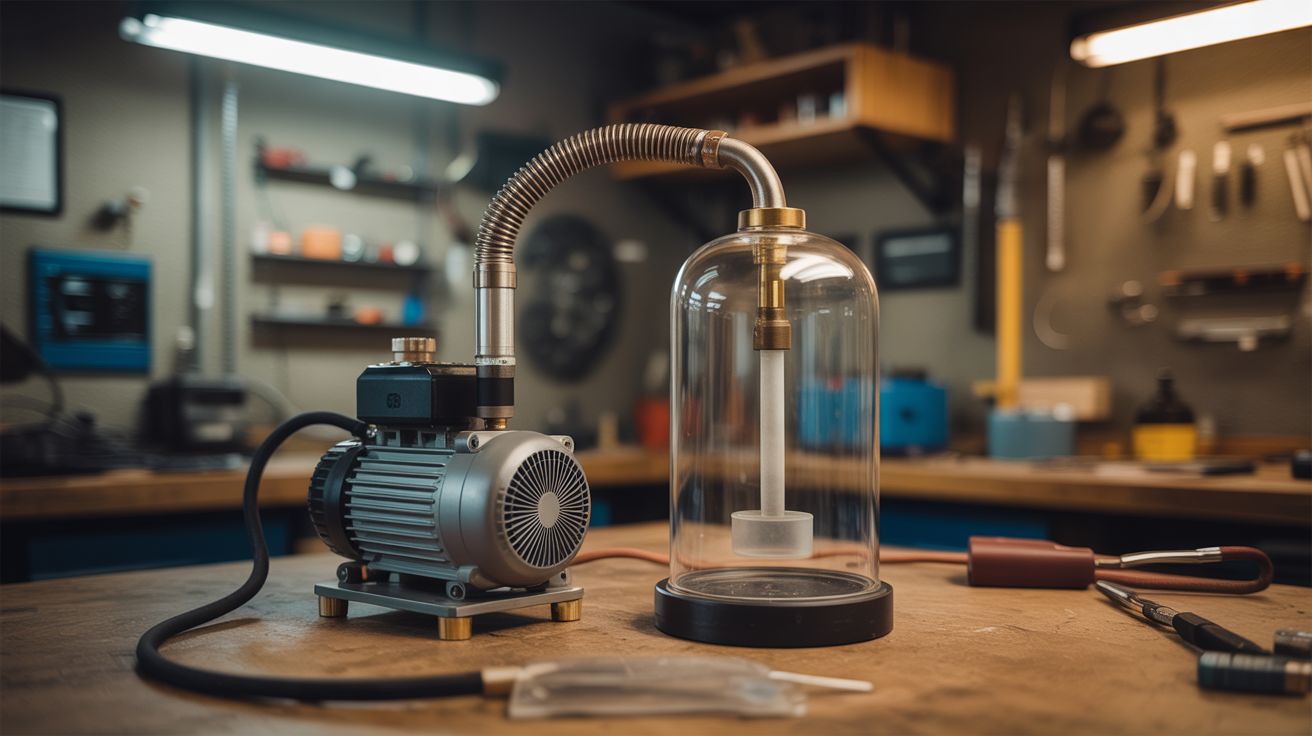
A vacuum chamber removes the air from an enclosed space, allowing you to observe what happens to objects and phenomena when atmospheric pressure is absent. Marshmallows expand to grotesque sizes. Water boils at room temperature. Shaving cream expands into a mountain. Sound vanishes — a ringing bell goes silent as you watch it vibrate. Electric arcs change character. Balloons inflate until they fill the chamber.
A refrigerator compressor is a positive-displacement pump. Normally it compresses refrigerant, but it works on air too. Connect the suction side to a sealed container and it'll pull the air out, reaching vacuum levels of 25-29 inches of mercury — more than adequate for dramatic experiments. A thick-walled glass bell jar or a heavy acrylic chamber provides the viewport. A vacuum gauge tells you how deep you've gone.
🧰 Ingredients
- Fridge compressor — with start relay and overload protector (dead fridge, curbside)
- Bell jar or acrylic vacuum chamber — thick-walled, rated for vacuum service (lab supply, online, ~$30-$80)
- Vacuum gauge — 0 to -30 inHg (hardware store, HVAC supplier)
- Silicone vacuum hose — rated for vacuum, not just pressure (HVAC supplier, auto parts)
- Base plate — thick acrylic, glass, or aluminum plate for the bell jar to sit on (hardware store, plastics supplier)
- Gasket — silicone or neoprene sheet cut to fit between the bell jar and base (hardware store)
- Ball valve — to seal the system and release vacuum (hardware store)
- Hose barb fittings — to connect the hose to the compressor and the chamber (hardware store)
- Vacuum grease — for sealing the gasket (lab supply, auto parts)
- Power cord (from the fridge)
🔨 Build Steps
- Prepare the compressor. Cut the refrigerant lines from the compressor. Identify the suction port (draws air in — the larger tube) and the discharge port (pushes air out — the smaller tube, gets hot). Leave the process tube capped. The electrical system (start relay + overload protector) should stay attached.
- Prepare the base plate. Drill a hole through the base plate for the vacuum hose fitting. Install a hose barb fitting with an airtight seal (epoxy or O-ring). The bell jar will sit on top of this plate with a gasket between them.
- Cut and fit the gasket. Cut a ring of silicone sheet to match the rim of the bell jar. The gasket sits between the jar and the plate and must create an airtight seal when the vacuum pulls the jar down. Apply a thin layer of vacuum grease to both gasket surfaces.
- Connect the plumbing. Run vacuum hose from the base plate fitting to the compressor's suction port. Install a ball valve inline — this lets you seal the chamber and turn off the compressor while maintaining vacuum. Connect the vacuum gauge to the base plate or inline.
- Add an oil catch. The compressor's discharge port will spit oil mist. Point it into a catch bottle or route it through a small filter. Never let the discharge oil recirculate into the suction — the compressor needs its oil internally.
- Seal everything. Vacuum systems are only as good as their worst seal. Check every connection with soapy water (brush it on and look for bubbles being sucked inward). Hose clamps on every barb fitting. Teflon tape on every threaded joint.
- Pull your first vacuum. Place the bell jar on the gasket. Power on the compressor. Watch the vacuum gauge drop. The jar should pull down against the plate as the air is evacuated. Full vacuum takes 2-5 minutes depending on chamber volume and compressor size. You'll hear the compressor's tone change as the load decreases.
- Run experiments. Place objects inside the chamber before evacuating: marshmallows, shaving cream, a partially inflated balloon, a cup of warm water, a ringing alarm clock. Observe as the atmosphere is removed. When done, crack the ball valve slowly to let air back in — a sudden rush of air can knock things over inside the chamber.
⚠️ Safety Notes
- Glass bell jars under vacuum are under significant mechanical stress — atmospheric pressure pushes inward with about 14.7 PSI on every square inch of surface. A cracked or flawed jar can implode, sending glass fragments outward. Inspect the jar for cracks, chips, or scratches before every use. Consider wrapping it in clear packing tape as a fragmentation shield, or use an acrylic chamber instead.
- The compressor can overheat if run continuously for long periods under hard vacuum. Fridge compressors are designed for intermittent duty with rest cycles. Let it rest for 5 minutes every 15-20 minutes of continuous pumping.
- Never put sealed containers, pressurized items, or liquids with low vapor pressure into the vacuum chamber — they can burst, boil explosively, or splatter the inside of the jar.