#081 — Sawzall Power Hammer
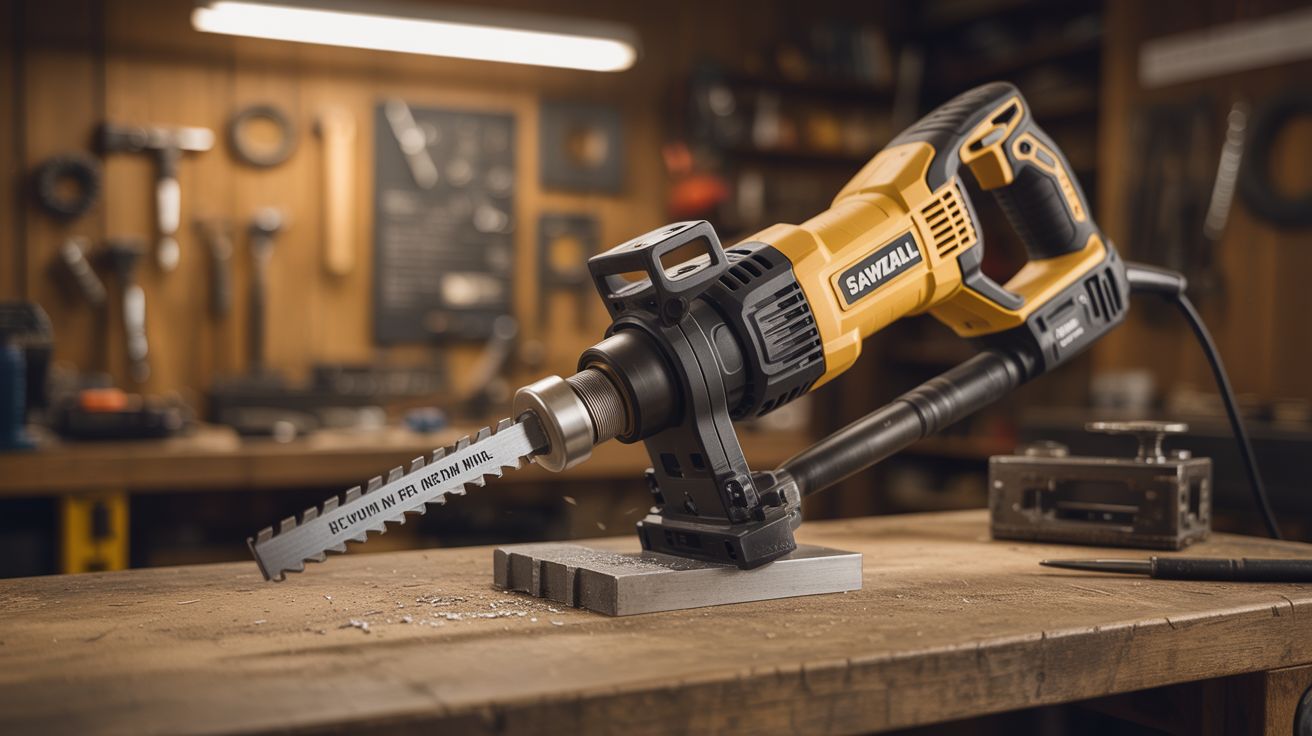
Replace the reciprocating saw blade with a hammer or chisel bit. 3,000+ hits per minute. A power hammer for texturing and shaping metal.
Ratings
🧪 What Is It?
A reciprocating saw (Sawzall) makes 2,500-3,000 strokes per minute with considerable force. Replace the saw blade with a flat piece of steel shaped as a hammer face or chisel point, and you have a power hammer that delivers thousands of precisely controlled impacts per minute. This is genuinely useful for metalworking: texturing sheet metal, setting rivets, planishing (smoothing hammer marks), chasing designs into metal, and forging small pieces. Commercial pneumatic hammers cost $100-500. A reciprocating saw with a modified blade does the same job for free. The variable speed trigger gives you fine control over impact rate and force.
🧰 Ingredients
- Reciprocating saw (Sawzall) (already own or thrift store)
- Flat steel bar — sized to fit the saw's blade clamp (hardware store)
- Angle grinder or bench grinder — for shaping the steel into hammer/chisel profiles (workshop)
- Metal file (workshop)
- Vise — for holding work during hammering (workshop)
- Anvil or steel block — as a backing surface (workshop)
🔨 Build Steps
- Measure the blade clamp. Check how your reciprocating saw holds its blade. Most modern saws use a quick-change clamp that grips a standard blade shank. Measure the shank width, thickness, and the slot/hole pattern needed to fit the clamp.
- Cut the steel bar. Cut a piece of flat steel bar to about 6-8 inches long, with the shank end sized to fit your saw's blade clamp. Use an angle grinder with a cutoff disc. The steel should be at least 1/4" thick for a hammer face — thinner stock flexes too much.
- Shape the working end. Grind the end of the steel bar into the desired profile. For a ball peen hammer face: round the tip into a hemisphere. For a flat hammer: leave it flat and square. For a chisel: grind to a V-edge. For texturing: create a cross-hatch pattern on the face. Multiple attachments for different jobs is ideal.
- Shape the shank end. Grind the other end to match the saw's blade clamp dimensions exactly. It needs to lock securely in the clamp — any play means the tool will eject under vibration. Test fit in the saw frequently while grinding.
- Heat treat (optional). For tools that take impact (hammers), heat the working end to cherry red with a torch and quench in oil for hardness. Then temper at 400F for 30 minutes for toughness. For chisels and punches, this step is more important — soft steel mushrooms quickly.
- Install in the saw. Insert the custom tool shank into the reciprocating saw's blade clamp. Verify it locks securely. Give it a tug — it should not pull free. If it's loose, the tool will launch out under operation.
- Set up the workpiece. Clamp your metal workpiece over an anvil or heavy steel block. The backing surface absorbs the impact energy. Without a solid backing, the saw just pushes the workpiece around instead of hammering it.
- Test at low speed. Start the saw at low speed, pressing the hammer face against the workpiece. You should see rapid, controlled impacts leaving marks on the metal. Increase speed for faster work. The trigger controls your impact rate.
⚠️ Safety Notes
- The reciprocating motion is fast and forceful. Keep fingers completely clear of the impact zone. The tool can skip or bounce off the workpiece unpredictably, especially on curved surfaces. Wear safety glasses — metal fragments fly.
- Ensure the custom tool shank is securely locked in the blade clamp. A tool ejecting at 3,000 RPM is a projectile. Test the grip before every session and replace if the shank shows wear.
- Prolonged use generates significant heat in both the tool and workpiece. Wear gloves and allow cooling breaks. The vibration can also cause hand fatigue and numbness — take regular breaks.