#145 — Music Visualizer LED Wall
An LED grid behind a diffuser panel analyzes audio in real time — your wall looks like a concert stage LED display.
Ratings
🧪 What Is It?
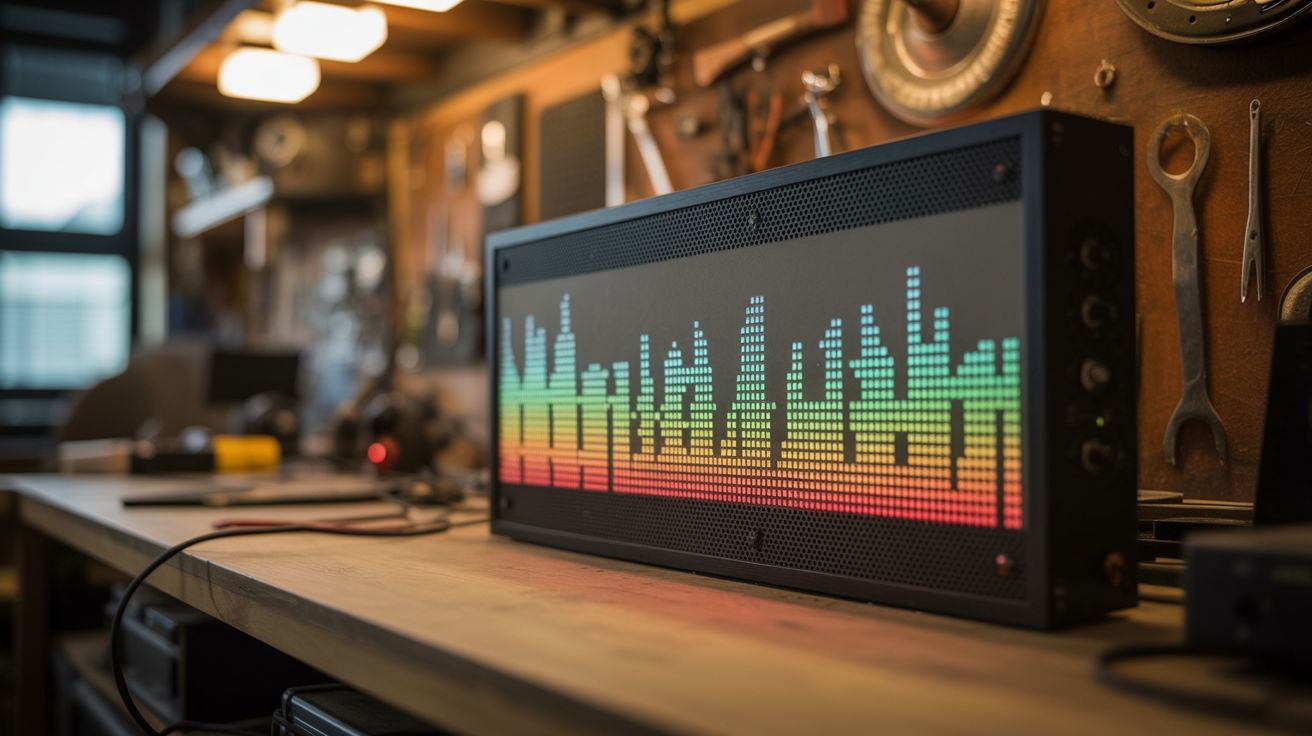
Concert LED walls react to the music — bass pulses, melodies ripple, beats flash. Build your own with a grid of addressable LEDs (WS2812B strips arranged in parallel rows) behind a frosted acrylic diffuser panel. A Raspberry Pi or laptop captures audio, performs FFT (Fast Fourier Transform) to decompose the music into frequency bands, and maps those bands to LED animations. Bass frequencies pulse the bottom rows, mids illuminate the middle, treble sparkles across the top. The diffuser smooths the individual LEDs into a glowing, organic display. Mounted on a wall behind your desk, DJ setup, or home theater, it transforms any room into a venue.
🧰 Ingredients
- WS2812B LED strip — 30 or 60 LEDs/meter, enough for a grid (e.g., 16x16 = 256 LEDs) (electronics supplier)
- Frosted acrylic panel — same dimensions as the LED grid, 3mm thick (plastics supplier, hardware store)
- Frame or mounting board — to hold the LEDs in a grid pattern (hardware store)
- Raspberry Pi 4 or laptop — for audio processing (electronics supplier or already own)
- USB sound card with line-in — for clean audio capture (electronics supplier)
- 5V power supply — 60A for a 16x16 grid at full brightness (electronics supplier)
- Level shifter — 3.3V to 5V for LED data line (electronics supplier)
- 3.5mm audio cable or microphone — for audio input (junk drawer)
- Python with numpy and pyaudio (pip install)
🔨 Build Steps
- Build the LED grid. Cut the WS2812B strip into equal rows and mount them on a flat board (MDF, foam board, or 3D printed grid). Space rows evenly. Wire the data line in a serpentine pattern (left-to-right on row 1, right-to-left on row 2, etc.) for efficient addressing.
- Wire the power. A 16x16 grid (256 LEDs) at full white draws up to 15A. Wire 5V power at BOTH ends of the strip to prevent voltage drop. Use thick wire (14-16 gauge) for the power runs. Add a 1000µF capacitor across the power supply output.
- Mount the diffuser. Space the frosted acrylic panel 1-2 inches in front of the LED grid. The gap determines how much the individual LEDs blend together — more gap = smoother blend, but larger overall depth. Build a frame to hold everything together.
- Set up audio capture. Connect your audio source (line-out from stereo, headphone jack, or microphone) to the Pi/laptop via the USB sound card. Install pyaudio and test that you can read audio buffers in real time.
- Implement FFT analysis. Use numpy's FFT to decompose each audio buffer into frequency bins. Group bins into bands: sub-bass (20-60Hz), bass (60-250Hz), mids (250-2000Hz), upper mids (2-4kHz), treble (4-20kHz). Calculate the energy in each band.
- Map frequencies to the grid. Assign grid rows to frequency bands — bottom rows = bass, middle rows = mids, top rows = treble. The energy in each band controls the brightness/color of its assigned rows. Apply smoothing to prevent flickering.
- Add visualization modes. Implement multiple modes: spectrum analyzer (horizontal bars), ripple (energy radiates from center), rain (colored drops fall from top), fire (bass-driven flames rise from bottom), plasma (flowing color patterns modulated by audio).
- Send data to the LEDs. Use the rpi_ws281x library (Pi) or serial protocol (laptop to Arduino) to update the LED grid at 30-60 FPS. Each frame calculates the color of every LED based on the current audio analysis and visualization mode.
- Wall mount and enjoy. Hang the completed panel on the wall. Connect audio and power. Play music and watch the wall come alive. Adjust sensitivity, color palettes, and visualization modes to match your taste.
⚠️ Safety Notes
- A full LED grid at maximum brightness draws enormous current. Never power the LED strip from the Pi or Arduino — use a dedicated power supply rated for the full load. Undersized power supplies overheat and create fire hazards.
- Ensure adequate ventilation behind the panel. 256+ LEDs at high brightness generate noticeable heat. The acrylic diffuser traps heat if there's no airflow. Add ventilation gaps at the top and bottom of the frame.
- Strobe effects and rapid flashing can trigger photosensitive seizures. Avoid visualization modes that flash the entire grid on/off rapidly. Smooth transitions and gradual changes are both safer and more visually appealing.