#273 — Washing Machine Motor Lathe
A dead washing machine motor spins a proper lathe chuck. Turn wood, polish metal, or make custom parts — for the cost of a trip to the curb.
Ratings
🧪 What Is It?
Washing machine motors are absurdly overbuilt for their job. A front-loading machine spins a heavy, off-balance load of wet clothes at 1,200 RPM without tearing itself apart. The motor that does this — typically a beefy induction motor or a brushless direct-drive unit — is designed for continuous duty, high torque, and years of daily abuse. When the machine dies (usually the control board, the door seal, or the drum bearings), the motor is almost always still perfectly fine.
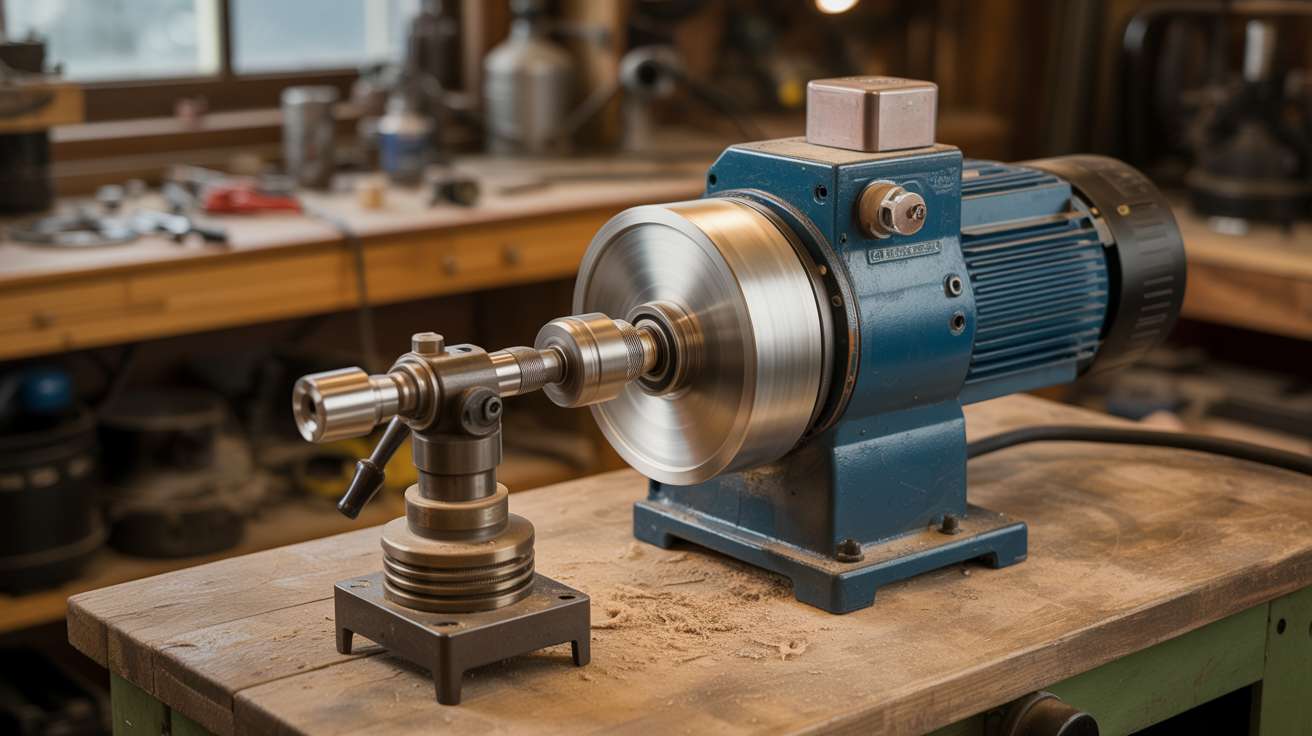
A lathe is, at its core, a motor that spins a workpiece while you hold a cutting tool against it. The requirements are simple: consistent speed, decent torque so it does not stall under load, low vibration, and a shaft you can mount a chuck on. A washing machine motor meets all of these requirements and exceeds most of them. The motor from a single dead washer, mounted on a sturdy wooden frame with a proper faceplate or chuck adapter on the shaft, becomes a functional lathe capable of turning wood blanks up to 10 inches in diameter.
This is not a toy lathe. Washing machine motors produce enough torque to turn serious workpieces — bowls, handles, legs, spindles, and decorative pieces. With the right tooling and a steady hand, the results are indistinguishable from work done on a commercial lathe that costs 20 times more. The main limitation is the bed length (determined by the frame you build), not the motor.
🧰 Ingredients
- Dead washing machine — specifically the motor, wiring harness, and capacitor (if induction type) (curbside, appliance repair shop, free)
- Lathe chuck or faceplate — a 4-jaw chuck with a shaft adapter, or a screw-on faceplate (online, $15-30)
- Shaft coupler or adapter — to mate the motor shaft to the chuck; depends on shaft diameter (hardware store or online, $5-10)
- Lumber for the frame — 2x6 and 2x4 pine or hardwood, heavy and rigid (hardware store, $10-15)
- Tool rest — steel angle iron or flat bar, mounted on an adjustable post (hardware store, $5-8)
- Speed controller — a router speed controller (for universal motors) or a VFD (for induction motors) (online, $15-40)
- Power switch — toggle switch rated for the motor's amperage (hardware store, $3)
- Bolts, nuts, screws — for frame assembly and motor mounting (hardware store, $5)
- Turning tools — wood chisels or dedicated lathe gouges (starter set $15-25, or grind your own from old files)
- Face shield — full face protection, not just safety glasses (hardware store, $8-12)
🔨 Build Steps
-
Extract the motor. Disconnect the washing machine from power. Remove the back panel or top to access the motor. On belt-drive machines, the motor is at the bottom, connected to the drum via a belt. On direct-drive machines, the motor is bolted directly to the rear of the drum. Disconnect the wiring harness (label or photograph the connections first). Unbolt the motor and remove it along with any start capacitor or wiring harness components.
-
Identify the motor type. Induction motors have a start capacitor wired in series with a start winding — they need the capacitor to run. Universal motors (brushed) run directly on mains power. Brushless DC motors (from newer direct-drive machines) need their original control board or a compatible ESC. The wiring approach depends on the motor type. Most curbside washers from the last 20 years use either a split-phase induction motor or a direct-drive brushless motor.
-
Build the frame. Construct a heavy, rigid bed from 2x6 lumber. The motor mounts at one end (the headstock). The frame should be at least 30 inches long to allow reasonable workpiece length. Bolt or lag-screw the frame to a heavy base to prevent walking under load. Rigidity is everything — any flex in the frame translates to chatter in the workpiece. Laminate two 2x6 boards together for the bed if needed.
-
Mount the motor. Bolt the motor firmly to the headstock end of the frame. The shaft should extend horizontally over the bed, centered and level. Use the motor's original mounting bracket if possible. Shim as needed so the shaft runs true — spin it by hand and check for wobble. Any wobble at the shaft means wobble at the workpiece, amplified by the distance to the cutting tool.
-
Attach the chuck or faceplate. Fit a shaft coupler or adapter to the motor shaft. The adapter should have a threaded end that accepts a standard lathe chuck or faceplate. Thread the chuck on and tighten firmly. Spin the assembly by hand to verify concentricity. If you cannot find a direct adapter, machine one from steel rod on a friend's lathe (ironic but practical), or use a rigid shaft coupler plus a short threaded spindle.
-
Build the tool rest. The tool rest is a horizontal bar positioned parallel to the workpiece, close to it, that you brace your cutting tools against. Weld or bolt a piece of steel angle iron (at least 12 inches long) to an adjustable post. The post slides along the bed and locks at any position with a bolt or clamp. The top edge of the rest should be smooth and at centerline height of the workpiece.
-
Wire the motor and speed control. For induction motors: wire the start capacitor per the motor's original circuit, then run the power through a router speed controller for variable RPM. For universal motors: a router speed controller works directly. For brushless DC: you need the original control board or a compatible ESC. Add a power switch inline. Ground the motor frame and the lathe frame to the electrical ground.
-
Test with a small workpiece. Mount a short piece of softwood (pine, 2-3 inches diameter, 6 inches long) in the chuck. Stand to the side, not in front. Power on at the lowest speed. The wood should spin smoothly with no visible wobble. Bring a sharp gouge to the tool rest and take a light test cut. If the motor stalls or slows significantly, the wood is too large for the speed setting — increase RPM or reduce cut depth.
-
Add a tailstock for long pieces. For workpieces longer than about 6 inches, you need a tailstock — a center point at the far end of the bed that supports the free end of the workpiece. Build one from a block of hardwood with a bearing-mounted point (a bolt ground to a conical tip works) that slides along the bed and locks in position. This prevents the workpiece from flexing away from the cutting tool.
-
Refine and upgrade over time. Once the basic lathe works, improvements accumulate naturally. Add a lamp for better visibility. Build a chip guard from clear acrylic. Add a second speed range by changing pulleys (if belt-driven). Build a set of dedicated turning tools from old files ground to lathe profiles. The frame can be extended, the tool rest can be upgraded to steel, and the whole thing can be mounted on a rolling cart. The point is: you now own a lathe, and a lathe is a machine that can make parts for itself.
⚠️ Safety Notes
Spicy Level 3 build. Read the Safety Guide before starting.
- Always wear a full face shield when operating a lathe. Workpieces can come loose from the chuck at high speed and become projectiles. Safety glasses are not sufficient — you need full face coverage.
- Never wear loose clothing, gloves, jewelry, or anything that can catch on a spinning workpiece. Tie back long hair. A lathe will wrap and pull with extreme force.
- Start every new workpiece at the lowest speed. Increase speed only after confirming the piece is balanced and securely mounted. Unbalanced pieces at high speed generate dangerous vibration.
- Ensure the motor frame and lathe frame are properly grounded. A wiring fault inside a salvaged motor could energize the frame.
- The chuck must be fully tightened before every use. Get in the habit of removing the chuck key immediately after tightening — a key left in a spinning chuck launches across the room.