#298 — Vacuum Sandblaster
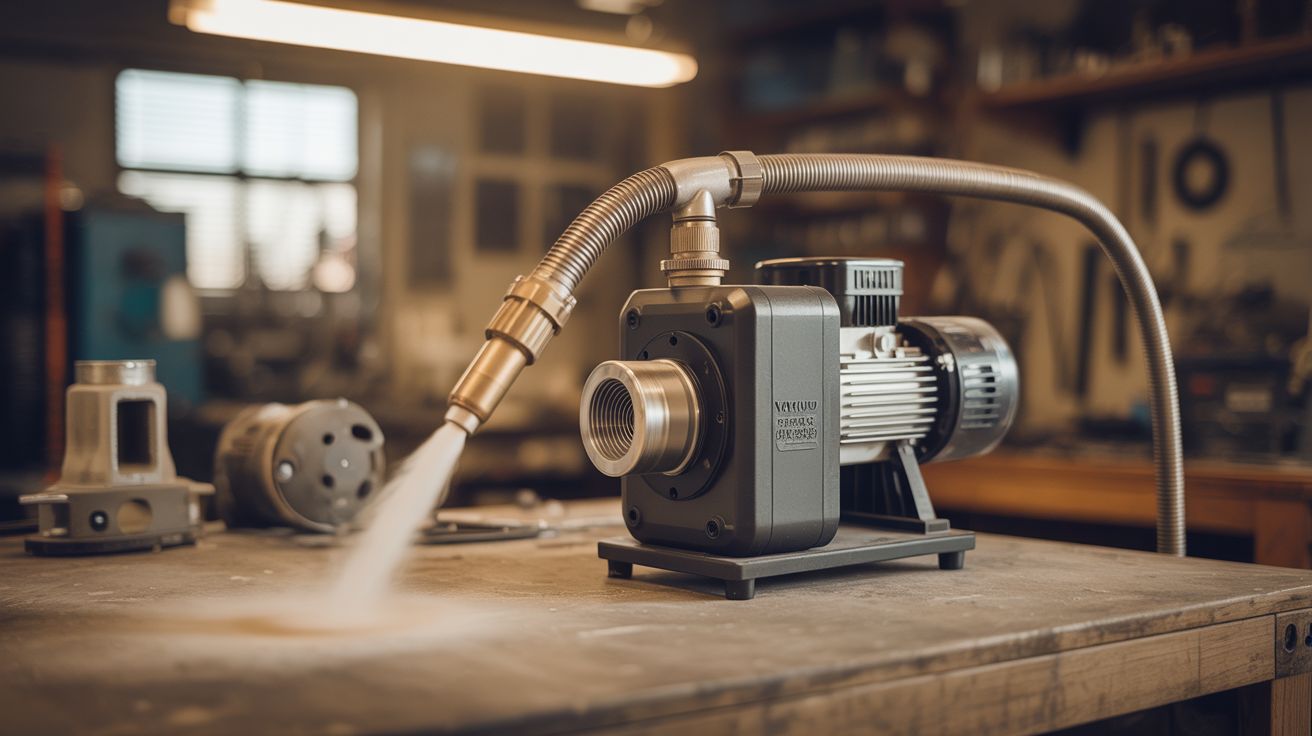
A reversed vacuum motor feeds pressurized air through a siphon tube, picks up sand from a bucket, and blasts it out a nozzle. Strips paint, kills rust, etches glass. A $200 tool built from trash and plumbing parts.
Ratings
🧪 What Is It?
Sandblasting is the brute-force approach to surface prep. You hurl tiny abrasive particles at a surface at high speed, and those particles rip off whatever's on top — paint, rust, scale, oxidation, old finish, your mistakes. Commercial sandblasters use a compressor to generate the air pressure, which means you need a $300+ compressor, a $100+ blast pot, hoses, fittings, and a CFM rating high enough to sustain flow. Most hobby compressors can't keep up — they run for 30 seconds and then chug for two minutes refilling the tank. A vacuum motor sidesteps all of that. It pushes continuous airflow at 80-120 mph on the exhaust side, no tank needed, no duty cycle limits. It's not as powerful as a big shop compressor, but for stripping brake calipers or cleaning up a rusty trailer hitch, it gets the job done.
The key engineering principle is the venturi effect. When high-velocity air passes over the opening of a small-diameter tube, it creates a zone of negative pressure at that opening. If the other end of the tube is submerged in a bucket of sand, the pressure differential sucks sand up into the air stream. The sand accelerates through the main barrel, exits a narrowed nozzle, and hits the target at speed. No moving parts in the media path. No augers, no feed wheels, no pressurized vessels. Just a tube in a bucket and some fast air. Same principle that makes a carburetor work and a perfume atomizer spray.
You can blast open-air on small projects, but for anything serious you'll want a cabinet — a plywood box with a plexiglass window and holes for rubber gloves. Cabinets contain the abrasive for reuse, keep dust out of your lungs, and prevent you from sandblasting things you didn't intend to, like your car's paint or your neighbor's opinion of you. Even a crude scrap-plywood cabinet transforms this from a messy outdoor tool into something you can use in a garage year-round.
🧰 Ingredients
- Vacuum cleaner motor — working motor from a dead upright or
-
PVC pipe — 1.5" diameter, about 3 feet total (hardware store, ~$5)
-
PVC fittings — one tee fitting, one reducer (1.5" to 3/4"), one coupling (hardware store, ~$6)
-
Siphon tube — 1/4" or 3/8" copper tubing or rigid vinyl tubing, about 18 inches (hardware store, ~$4)
-
Abrasive media — play sand for general use, aluminum oxide for aggressive stripping, glass bead for fine finishing (hardware store / online, ~$5-15 per bag)
-
Bucket — 5-gallon, serves as the media hopper (already own or hardware store, ~$3)
-
Nozzle tip — 3/4" to 1/2" PVC reducer or a short length of copper pipe (hardware store, ~$3)
-
Duct tape + hose clamps — for sealing all joints airtight (hardware store, ~$5)
-
Wire nuts + heavy-gauge extension cord — for motor wiring (hardware store)
-
Safety glasses — impact-rated, full seal around eyes (mandatory, ~$8)
-
Respirator — N95 minimum, P100 half-face strongly preferred (mandatory, ~$15-30)
-
Heavy work gloves — leather or thick rubber (mandatory, ~$10)
-
Optional: 3/4" plywood, plexiglass sheet, rubber dish gloves — for building a blasting cabinet (hardware store, ~$25-40)
🔨 Build Steps
-
Extract the motor. Pull the motor assembly out of the dead vacuum. You need the motor and its impeller fan — ditch the housing, bags, filters, hose, and everything else. Identify the exhaust side (where air blows out when powered on). If you're not sure which side is exhaust, power it on briefly and hold your hand near each opening. The side that tries to blow your hand away is your working end.
-
Build the main air line. Cut a 2-foot length of 1.5" PVC pipe. Attach it to the motor's exhaust port using a coupling, reducer, or generous duct tape — whatever gets a tight seal. Air leaks anywhere in this line kill the venturi effect. Tape every joint, then tape it again. Use hose clamps over the tape for anything that vibrates.
-
Install the tee fitting. About 6 inches from the nozzle end of the main line, cut the pipe and insert a PVC tee fitting. The branch port points downward — this is where the siphon tube connects. The siphon tube should enter the air stream at roughly 30-45 degrees, angled toward the nozzle. A perpendicular entry works but is less efficient. File an oval hole in the tee branch or use a 45-degree elbow stub to get the angle right. Incoming media needs to get swept forward by the air, not slammed sideways into the pipe wall.
-
Attach the siphon tube. Insert the copper or vinyl tube into the tee's branch opening. Seal around it with epoxy or silicone caulk. The tube should protrude about 1/8" to 1/4" past the inner wall of the main pipe — far enough that the fast-moving air creates suction across the tube opening, not so far that it blocks main airflow. This is the most finicky part of the build. If the siphon doesn't pull, adjust this protrusion first. The bottom end of the tube drops into the bucket of abrasive, with 1-2 inches of clearance above the bucket bottom so it doesn't bury itself and choke.
-
Build the nozzle. At the business end, attach a reducer to narrow the opening from 1.5" down to 3/4" or 1/2". For a wear-resistant tip, press-fit a short copper pipe into the PVC reducer. Sand eats bare PVC nozzles alive — copper lasts dramatically longer.
-
Wire the motor. Connect the motor to a switch and extension cord using wire nuts. Use 14-gauge or heavier cord for the typical 10-12 amp draw. Mount a toggle switch within easy reach — you'll cycle power frequently between passes.
-
Set up the media hopper. Fill the bucket about one-third full with abrasive media — more than that and the sand column's weight resists the siphon pull. Drop the siphon tube in, submerged but not buried at the bottom. The media must be bone dry. Wet sand clumps and blocks the siphon within seconds. Dry sand is non-negotiable.
-
Test the siphon. Power on the motor and watch the siphon tube. Within a few seconds, media should climb the tube and a gritty blast should exit the nozzle. Aim at scrap metal or concrete. If nothing happens: check for air leaks (listen for hissing), adjust the siphon tube protrusion, try a smaller tube diameter, and verify media is dry. Once pulling consistently, mark the tube position for reassembly.
-
Dial in your technique. Hold the nozzle 2-4 inches from the target surface. Closer hits harder but covers less area. Move steadily in overlapping passes — parking in one spot will warp thin sheet metal, gouge softwood, or etch too deep. Start on scrap to calibrate distance and speed. Rust on steel comes off in a single pass. Old paint takes two or three. Bare metal emerges shiny and lightly textured — perfect for paint adhesion.
-
Build a blasting cabinet (optional but recommended). Plywood box, roughly 24"x24"x18". Cut a window in the front, silicone plexiglass over it. Below the window, cut two 4-inch holes and glue in rubber dish gloves with cuffs facing outward. Cut a side slot for the nozzle. Seal all seams. Workpiece goes inside, you reach in through the gloves. Add a shop-vac port in the back wall to pull dust during use — keeps the window clear and your lungs happy.
-
Recycle your media. After blasting, pour the bucket through a fine mesh screen over a second bucket. Good media falls through, paint chips and rust stay on top. Play sand is cheap enough to replace, but aluminum oxide and glass bead at $10-15 a bag are worth screening and reusing.
⚠️ Safety Notes
-
Silicosis is real and permanent. Inhaling fine silica dust causes irreversible lung scarring — no treatment, no recovery. Wear a P100 half-face respirator at minimum. If blasting without a cabinet, work outdoors with wind at your back. Never blast in a closed garage.
-
Abrasive media at velocity shreds skin and destroys eyes. Wear impact-rated sealed goggles, heavy gloves, long sleeves, and closed-toe shoes. A direct nozzle hit cuts through a cotton shirt.
-
The motor runs on mains voltage. Use a GFCI outlet. Keep wiring away from accumulated dust — fine abrasive is conductive enough to short terminal blocks. Inspect connections before every session.
-
Abrasive dust destroys motor bearings. After each session, pull the siphon tube out and run the motor dry for 60 seconds to blow grit out of the impeller housing. The bearings will eventually fail under heavy use — that's fine, it was a free motor.
-
Aluminum oxide is far more aggressive than play sand — it punches through thin sheet metal in seconds. Test on scrap first. Glass bead is gentler but makes finer dust. Same respiratory protection required regardless of media type.