#299 — Pneumatic Launcher
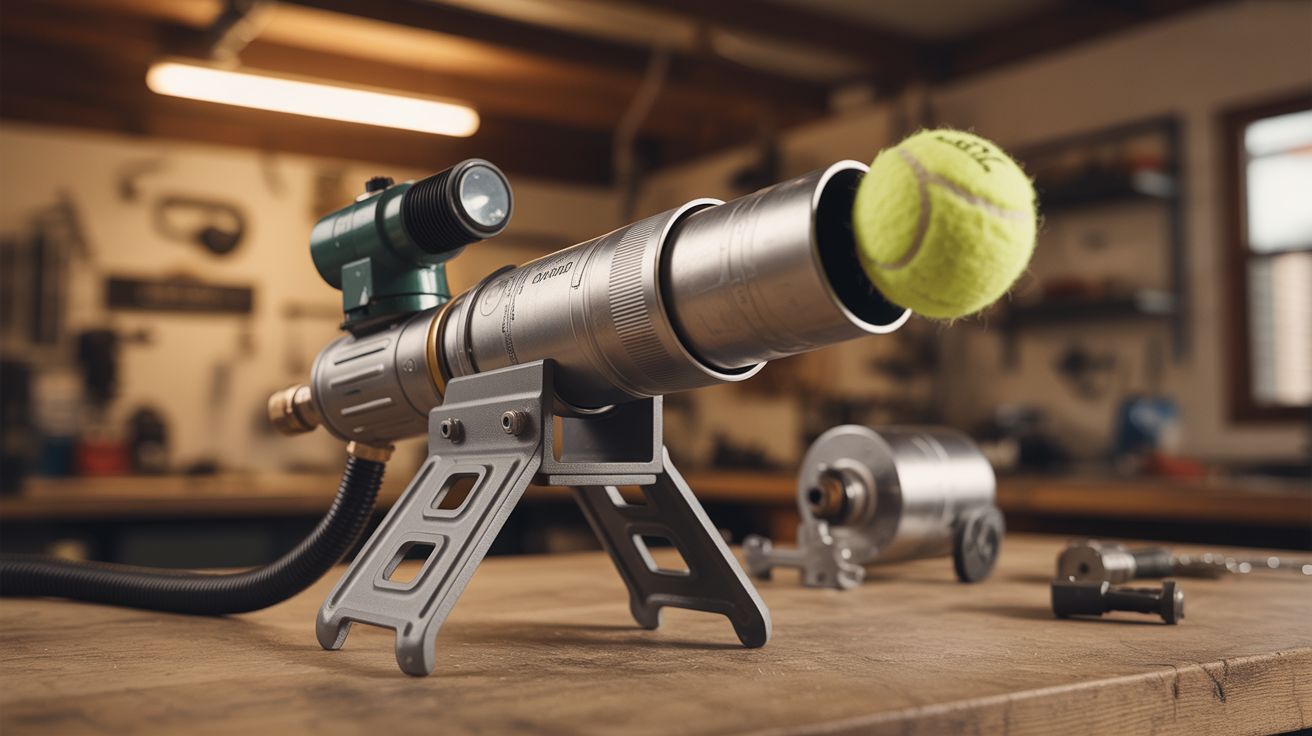
Vacuum motor + PVC pressure chamber + ball valve = a cannon that runs on air. Load a tennis ball. Pull the trigger. Watch it disappear.
Ratings
🧪 What Is It?
A pneumatic launcher is a tube that shoots things using compressed air. The concept is dead simple: pressurize a sealed chamber, put a projectile in a barrel connected to that chamber, open a valve quickly, and the rush of air accelerates the projectile out the barrel at speeds that range from "fun" to "genuinely alarming." Commercial T-shirt cannons at sporting events work on this exact principle. So do potato guns, ball launchers, and pneumatic cannons used in film special effects. The only difference between them is the air source and how much pressure you're working with.
This build uses a vacuum motor running in reverse — blow mode. A vacuum motor's impeller pushes 50-100 CFM of air. Plumb that output into a sealed PVC pressure chamber and it builds up several PSI over 15-30 seconds. That's not a lot compared to a real compressor, but it's more than enough to launch a tennis ball 50-100 feet, send a T-shirt into the upper deck of a stadium, or fire a potato into the next zip code. The low pressure actually makes this build safer — you're working with 5-15 PSI, not 100+. Still plenty of energy to be impressive. Not enough to be catastrophically stupid.
The underlying physics is straightforward gas dynamics: Force = Pressure x Area. A 3-inch diameter barrel gives about 7 square inches of cross-sectional area. At 10 PSI, that's 70 pounds of force shoving a 2-ounce tennis ball forward. The projectile continues accelerating as long as chamber pressure behind it exceeds atmospheric pressure ahead of it. Once it exits the barrel, acceleration stops and drag takes over. Longer barrels give more acceleration time up to a point — eventually the expanding gas drops below atmospheric pressure and barrel friction becomes a net negative. For this build, 3 feet of barrel is the sweet spot.
Where this gets interesting is the range of applications. A vacuum-powered launcher at 10 PSI is a perfectly good T-shirt cannon for a school pep rally, a ball launcher for a dog park, or a confetti cannon for a wedding. Scale the chamber up and the barrel diameter down and you have a tennis ball mortar that arcs across a football field. Go the other direction — big barrel, low pressure, foam projectile — and you have an indoor demo piece safe enough for a science fair. The platform is endlessly configurable because every variable is independent: change the chamber size for more or less stored energy, change the barrel for different projectiles, change the pressure for different ranges. One launcher, many missions.
The critical component is the release valve. A ball valve works but requires a quick quarter-turn to open fully. A sprinkler valve (actuated by a 9V battery) opens in milliseconds for a faster, cleaner air dump and dramatically more consistent shots. Valve speed matters enormously — a slow-opening valve allows the chamber to partially depressurize before full flow is established, wasting energy. An instant-open valve dumps the full chamber pressure all at once, giving maximum initial acceleration. The difference between a casual ball-valve twist and a snappy sprinkler valve release can double your range. Either way, the valve sits between the pressure chamber and the barrel. Pressurize, load, trigger, launch. It's the most crowd-pleasing build in this entire category, and the one most likely to get you invited to neighborhood block parties.
🧰 Ingredients
- Vacuum cleaner motor — from a dead upright or canister, 1000W+ preferred for faster charge times (curbside, e-waste bin, thrift store)
- PVC pipe, 4" diameter, Schedule 40 — about 2 feet for the pressure chamber (hardware store, ~$10)
- PVC pipe, 2-3" diameter — about 3 feet for the barrel; size to your projectile (hardware store, ~$6)
- PVC end caps, 4" — two caps to seal the pressure chamber (hardware store, ~$4 each)
- PVC reducer fitting — 4" to 2" (or 3"), connects chamber to barrel (hardware store, ~$5)
- Ball valve, 2" — the trigger; quarter-turn to dump air (hardware store, ~$8)
- PVC coupler fittings — for joining sections (hardware store, ~$2 each)
- PVC primer and cement — for permanent, airtight pipe joints (hardware store, ~$8)
- PTFE thread tape — for sealing all threaded connections (hardware store, ~$2)
- Pressure gauge, 0-30 PSI — monitors chamber pressure during charging (hardware store or auto parts, ~$6)
- Safety relief valve, 15-20 PSI — mandatory pressure cap; this is not optional (hardware store, ~$8)
- Hose clamp and short flexible hose — connects motor exhaust to chamber inlet (hardware store, ~$4)
- Wire, switch, and power cord — for motor power; heavy gauge rated for 12+ amps (hardware store, ~$5)
- Duct tape — for barrel fit adjustments and quick sealing (hardware store)
- Tennis balls, soft foam balls, or rolled T-shirts — projectiles (dollar store, sporting goods)
- Thin plastic produce bags — for wrapping T-shirt projectiles (grocery store, free)
- Scrap wood or PVC frame — mounting structure to hold the assembly together (scrap bin)
- Pipe clamps or U-bolts — for securing barrel and chamber to the frame (hardware store, ~$4)
- Soapy water in a spray bottle — for leak testing joints (kitchen)
- Dowel or broomstick — for loading projectiles and clearing jams (scrap bin)
- 120-grit sandpaper — for smoothing barrel interior and cut edges (hardware store, ~$3)
- Zip ties — for routing and securing wiring along the frame (hardware store, ~$3)
- Sharpie marker — for labeling fittings, marking gauge targets, and writing "THIS END TOWARD ENEMY" on the barrel (junk drawer)
- Safety glasses — mandatory during testing and operation (hardware store, ~$5)
- Measuring tape — for cutting pipe to length and checking barrel dimensions (toolbox)
- Optional: sprinkler valve (24V solenoid) + 9V battery — for instant electronic trigger (hardware store, ~$12)
- Optional: stepped drill bit — makes clean holes in PVC for gauge and valve ports (hardware store, ~$10)
- Optional: union fitting — for swappable barrel connections (hardware store, ~$6)
- Optional: car battery + 12V-to-120V inverter — for cordless operation (auto parts store, ~$25-40)
- Optional: silicone sealant — for stubborn leaks that cement and tape can't fix (hardware store, ~$5)
🔨 Build Steps
-
Plan the layout. The launcher has three main sections in a line: pressure chamber (large PVC), valve (ball valve or sprinkler valve), and barrel (smaller PVC). The vacuum motor feeds air into the chamber through a side port. The pressure gauge and relief valve mount on the chamber body. Sketch this on paper before cutting anything — include dimensions, fitting types, and where each port goes. Label every piece with its position. A clear plan prevents the most common mistake: gluing a fitting in the wrong orientation.
-
Dry-fit everything. Lay out all the pieces on a workbench and confirm they go together before any glue touches any pipe. Check that the reducer matches the chamber, that the valve threads align, that the barrel slides into its fitting. Assemble the entire launcher dry — no glue, no tape — and hold it up to check alignment and balance. PVC cement sets in seconds and the bond is permanent. There are no do-overs. If a fitting is wrong, you're cutting that section out and buying a replacement. Buy one spare of every fitting. They're cheap. Mistakes aren't.
-
Build the pressure chamber. Cut a 2-foot section of 4" Schedule 40 PVC pipe. Glue an end cap on one end using PVC primer and cement. Apply primer to both the pipe exterior and cap interior, let it tack for 10 seconds, then apply cement and push together with a quarter-turn. Hold for 30 seconds. On the other end, glue a 4" to 2" (or 3") reducer fitting. This reducer is where the chamber connects to the valve. The chamber volume determines how much air you have per shot — bigger chamber means more force but longer charge times.
-
Install the air inlet. Drill a hole in the side of the pressure chamber near the capped end. Size it to accept a PVC fitting or hose barb — a stepped drill bit makes clean holes in PVC without cracking it. Glue or thread in a fitting and connect it to the vacuum motor's exhaust output via a short section of flexible hose. Seal the connection with a hose clamp tightened with a screwdriver, not just finger-tight. This is where the motor pumps air into the chamber. The inlet should face upward or sideways when the launcher is in firing position — don't point it down where gravity can pool condensation into the motor.
-
Install the pressure gauge. Drill a second hole in the pressure chamber and install a threaded fitting for the pressure gauge. Use PTFE thread tape on all threaded connections — wrap it clockwise around the threads five or six times. The gauge lets you monitor chamber pressure during charging. Critical for consistent shots and for knowing when you've hit your target PSI. Mount it where you can read it from the operating position.
-
Install the safety relief valve. Drill a third hole in the chamber and install the relief valve, set to open at 15-20 PSI. This is not optional. The vacuum motor probably can't generate dangerous pressures on its own (it tops out around 5-15 PSI in a sealed chamber), but if something blocks the exhaust and the motor keeps running, or if someone decides to "upgrade" to a real compressor later, the relief valve prevents the chamber from becoming a pipe bomb. PVC under pressure fails by shattering into shrapnel, not by splitting cleanly.
-
Install the trigger valve. Connect the ball valve to the reducer fitting on the pressure chamber. Use PVC cement for a permanent connection on the chamber side. The barrel side of the valve gets another fitting to accept the barrel pipe. A ball valve requires a fast quarter-turn to open — practice the motion until it's one smooth flick. Slow valve opening bleeds pressure and gives weak shots. For instant release, use a 24V sprinkler valve wired to a momentary push button and powered by a 9V battery (or two in series for faster actuation). The sprinkler valve opens in milliseconds, dumping the chamber all at once.
-
Build the barrel. Cut a 3-foot section of 2-3" PVC pipe. The internal diameter should be slightly larger than your projectile — a tennis ball is about 2.6 inches, so a 3" pipe works perfectly. Drop a ball in the barrel and tilt it — the ball should slide freely but fit snugly enough to create a reasonable seal. Too loose and the air blows past without accelerating it. Too tight and friction eats your velocity. If the fit is close but not quite right, sand the inside lightly or wrap the projectile in a layer of duct tape to fine-tune the seal. Connect the barrel to the output side of the valve.
-
Smooth the barrel interior. Any burr, ridge, or rough spot inside the barrel adds friction and can snag soft projectiles like T-shirts. Sand the interior with 120-grit sandpaper rolled around a dowel. Pay special attention to the muzzle end and any cut edges — PVC saws leave a lip of material that catches on everything. A smooth bore means consistent shots. This takes five minutes and makes a noticeable difference in both accuracy and projectile speed.
-
Build the mounting frame. The assembled launcher is a few feet long and awkward to hold without a frame. Build a simple support structure from scrap wood or PVC pipe that holds the chamber, valve, and barrel in alignment. Add a handle near the valve for aiming and a flat base for stability. For a stationary launcher (demo or event use), mount the whole assembly on a stable platform angled upward at 30-45 degrees for maximum range. Pipe clamps or U-bolts work well for securing round PVC to a flat frame. Make sure the frame doesn't block access to the barrel (loading end), the pressure gauge, or the trigger valve.
-
Wire the motor. Connect the vacuum motor to a power cord with an on/off switch. The switch controls the air pump — flip it on to charge, flip it off before firing. Label the switch clearly. Use a heavy-gauge extension cord rated for the motor's draw (typically 10-12 amps) — a wimpy cord will overheat and melt under sustained load.
-
Wire the trigger (if using sprinkler valve). A 24V sprinkler solenoid needs a power source — a 9V battery will open most sprinkler valves, though two 9V batteries in series (18V) gives a snappier actuation. Wire the solenoid to a momentary push button so the valve opens only while you hold the button and snaps shut when you release. Keep trigger wiring completely separate from motor wiring. Route wires along the frame and zip-tie them out of the way.
-
Leak test the system. Before loading any projectiles, power on the motor and let the chamber pressurize with the barrel blocked (use a cap or plug). Listen for hissing at every joint. Spray soapy water on connections — bubbles reveal leaks. Check the end caps, the reducer joint, every threaded port, and the hose connection. Fix leaks with more PVC cement, thread tape, or silicone sealant. A leaky chamber means longer charge times and lower peak pressure. Even a tiny leak at 10 PSI vents significant volume. Also check the hose from the motor — flexible hose under pressure can pop off if not clamped properly. Get it airtight.
-
Prepare your projectiles. Tennis balls work out of the box for a 3" barrel. For T-shirt launching, roll the shirt tightly like a burrito, wrap it in a thin plastic produce bag, and tape the ends shut. The bag reduces friction against the barrel wall and creates a better air seal than fabric alone. For a crowd-pleasing effect, use a bag thin enough to rip open mid-flight — the shirt unfurls in the air like a parachute. Soft foam balls are the safest option for close-range demos and events with kids. Whatever you use, prep a dozen before you start shooting. Reloading should take seconds, not minutes.
-
Load and test at low pressure. Load a tennis ball into the barrel, pushing it to the valve end with a dowel or broomstick. Turn on the vacuum motor and watch the gauge. At 3-5 PSI, turn off the motor and open the ball valve quickly. The ball should launch 20-50 feet. If it dribbles out, the barrel fit is too loose (wrap the ball in duct tape for a snugger fit) or the valve isn't opening fast enough. If a projectile gets stuck in the barrel, that's a jam — open the valve slowly to vent pressure, then push the projectile out from the muzzle end with a dowel. Never try to force more air behind a stuck projectile.
-
Increase pressure and dial in. Charge incrementally — 5 PSI, 8 PSI, 10 PSI, 12 PSI. Note the range at each level. A tennis ball at 10-12 PSI from a 4" chamber through a 3-foot barrel will travel 50-100+ feet. T-shirts are heavier and bulkier — they need more pressure for the same range, and the barrel fit matters more. If a projectile barely clears the muzzle, you need a tighter fit, more pressure, or a shorter barrel. If it rockets out with authority, you've got headroom to dial back the charge time. Keep notes on what works at each pressure — you'll want this data later.
-
Mark your operating pressure. Once you've found the sweet spot for each projectile type, mark the "ready" pressures on the gauge face with tape or a Sharpie line. Label each mark (e.g., "tennis" at 10 PSI, "T-shirt" at 12 PSI). This is your standard charge level for consistent, repeatable shots. Overpressure wastes charge time and motor wear. Underpressure gives embarrassing dud shots in front of a crowd — and crowds remember duds more than they remember the good launches.
-
Build interchangeable barrels (optional). Different projectiles want different barrel diameters — 2" for small foam balls, 3" for tennis balls, 4" for T-shirts. Use a union fitting at the valve-to-barrel connection so you can swap barrels without tools. Build each barrel the same length (3 feet) so your range calibration stays roughly consistent across projectile types. Sand and smooth each one individually.
-
Go cordless (optional). A car battery and a 12V-to-120V inverter powers the vacuum motor without an extension cord. The battery lasts for dozens of shots since the motor only runs during the 15-30 second charge cycle. Mount the battery, inverter, and launcher on a cart or wagon for a fully portable rig that works anywhere — parking lots, fields, stadiums. Strap the battery down so it doesn't shift when you tilt the launcher.
-
Prep for events. If you're running this at a block party, school demo, or charity fundraiser, rehearse the full cycle: charge, load, fire, reload. Bring spare projectiles, a backup 9V battery for the sprinkler valve, and duct tape for field repairs. Pre-charge before each shot — there's nothing more deflating than a crowd watching a pressure gauge creep upward in silence. Have someone on reload duty feeding you prepped projectiles. The difference between a polished performance and a fumbling one is logistics, not engineering.
⚠️ Safety Notes
Spicy Level 3 build. Read the Safety Guide before starting.
- PVC pipe is not rated for pneumatic pressure service. Schedule 40 PVC handles water pressure, but air pressure failures are more dangerous because compressed air stores energy — water doesn't. PVC fails by shattering into sharp fragments, not by splitting. Stay under 20 PSI for this build. The safety relief valve is your insurance policy.
- Never stand in front of the barrel. Never point the barrel at anyone, even when the chamber is "empty." Treat it like a firearm: always pointed in a safe direction, always assume it's loaded.
- Tennis balls at 10+ PSI hit hard enough to cause bruising at close range. Soft foam balls are safer for crowd events. Never load hard or sharp projectiles — rocks, golf balls, or metal objects turn a party trick into an assault charge.
- The vacuum motor draws high current (10-12 amps). Use a properly rated extension cord and a GFCI outlet. Keep all electrical connections away from moisture.
- Wear safety glasses during testing. PVC joints can fail, barrels can crack, and projectiles ricochet. Ear protection is also smart — the air dump is loud, especially in enclosed spaces.
- Check local laws before building. Pneumatic launchers may be classified as firearms or destructive devices in some jurisdictions depending on projectile type and muzzle energy. T-shirt cannons at events typically require permits or insurance.
- Never leave the chamber pressurized and unattended. After each session, open the valve to dump remaining pressure, then disconnect the motor from power.
- If operating around kids, establish a clear firing range with a safe backstop. Mark a "no-go zone" in front of the barrel with cones or tape. Designate one person as the operator — don't let a crowd take turns without supervision.
- Do not use ABS pipe as a substitute for PVC. ABS has a lower pressure rating and is even more prone to catastrophic brittle failure under pneumatic loads. Do not use thin-wall DWV (drain/waste/vent) PVC either — it's rated for zero pressure.
- If you hear a creak, pop, or any unusual sound from the chamber under pressure, immediately vent the system and inspect every joint and fitting. PVC gives very little warning before it fails. When in doubt, depressurize first and ask questions later.
- Inspect the chamber, joints, and barrel before every session. Look for hairline cracks, cloudy discoloration, or cement joints pulling apart. PVC degrades in UV sunlight — store the launcher indoors. If the pipe looks chalky or yellowed, replace it before pressurizing again.
- The flexible hose between the motor and the chamber is a weak point under repeated pressure cycling. Inspect it before every session for bulging, cracking, or soft spots. Carry a spare hose section and extra hose clamps.
- When transporting the launcher, dump all pressure first. A pressurized chamber bouncing around in a car trunk is a terrible idea. Treat transport the same as storage: depressurized, motor disconnected.
- If the vacuum motor overheats (you'll smell it), shut it down immediately and let it cool for 10-15 minutes. Running the motor continuously for long charge cycles wears the brushes and windings. Short duty cycles — 30 seconds on, fire, repeat — are fine. Five minutes of continuous run time is not.
- Test the relief valve before your first real session. Pressurize the chamber slowly and confirm the valve actually opens at its rated pressure. A stuck relief valve provides zero protection. Tap it with a wrench while the chamber is at a few PSI to make sure it's not seized.