#337 — Infinity Room
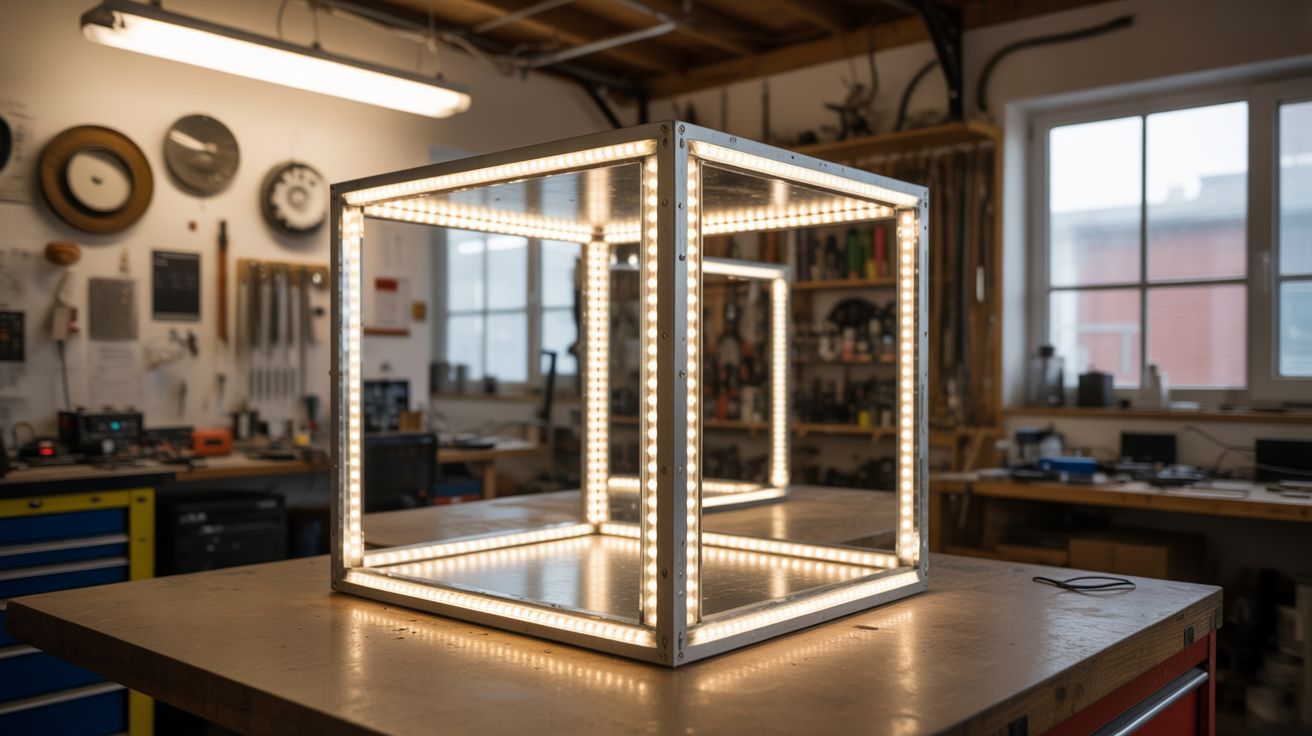
A box of mirrors and LED strips that creates the illusion of infinite glowing space — Kusama on a junkyard budget.
Ratings
🧪 What Is It?
An infinity room is an enclosed space — anywhere from a shoebox-sized peephole version to a walk-in closet — where every interior surface is a mirror, with LED strips running along the edges. Each LED reflects infinitely in every direction, creating the illusion that you're floating in a boundless void filled with receding points of light. The viewing panel uses one-way mirror film: from outside, the box looks dark and opaque. Step inside (or peer through the peephole) and you're suddenly suspended in infinite space.
The physics are dead simple — parallel mirrors create infinite reflections. Every kid has seen this in an elevator or bathroom. But when you control the lighting (LEDs along the edges, no other light source) and seal the box so no outside light leaks in, the effect goes from "neat" to "transcendent." Each reflection is slightly dimmer than the last, so the lights fade into infinity in every direction. Your brain has no reference plane, no walls, no floor — just an endless grid of glowing points.
Yayoi Kusama charges museum admission for this. You can build it from thrift store mirrors, scrap plywood, and a $6 roll of LED strip. The tabletop peephole version takes an afternoon. The walk-in version takes a weekend and some friends to help carry mirrors.
🧰 Ingredients
- Mirrors — enough to cover all interior faces of your box (source: thrift store furniture mirrors, old medicine cabinets, gym/dance studio closures — thrift stores are loaded with these, ~$2-15 each)
- Plywood or MDF — for the box frame, 1/2" thick (source: hardware store, scrap pile)
- LED strip — addressable WS2812B or simple single-color strip (source: dead electronics, online, ~$5-10)
- One-way mirror film — adhesive window tint that acts as a half-mirror (source: auto parts store or online, ~$8-12 per roll)
- Clear acrylic or glass panel — for the viewing window, sized to one face of the box (source: old picture frame, hardware store)
- LED controller or Arduino — for color modes, dimming, animation (source: online, ~$3-5)
- 5V or 12V power supply — matched to your LED strip (source: old phone charger, laptop brick)
- Black silicone caulk or gaffer tape — for sealing edges against light leaks (source: hardware store)
- Wood screws, wood glue, corner brackets (source: hardware store)
- Optional: crystal beads, small LED orbs, or fishing line with tiny LEDs for hanging elements (source: craft store, dollar store)
🔨 Build Steps
-
Build the frame. Construct a box from plywood or MDF. For a tabletop peephole version, 18"x18"x18" is a great size. For a walk-in version, you're building a room — frame it with 2x4s and sheet the interior with plywood. The box needs to be square or rectangular with tight joints. Every face will be covered, so appearance doesn't matter — structural rigidity does.
-
Cut mirrors to size. Measure each interior face and cut mirrors to fit. Score-and-snap works for thin mirror glass — use a glass cutter, straightedge, and firm even pressure. If your thrift store mirrors are already close to the right size, build your box dimensions around them instead. Wear heavy gloves for this step.
-
Mount mirrors on all interior faces. Attach mirrors to all interior surfaces using mirror adhesive (NOT regular construction adhesive — it eats the mirror backing). For the floor and ceiling, mirrors go face-inward. Leave one face open for now — this will be your viewing panel. On the walk-in version, leave a door-sized opening.
-
Install LED strips along the edges. Run LED strips along every interior edge where two mirror faces meet. The strips sit in the corner seam, facing inward. This placement means each LED appears in both adjacent mirrors, multiplying the effect. For maximum impact, use addressable RGB strips so you can program color chases, breathing effects, and rainbow modes.
-
Build the viewing panel with one-way mirror film. Apply one-way mirror film to a clear acrylic or glass panel. Apply the film so the reflective (mirror-finish) side faces the LED-lit interior. One-way mirror film works by relative brightness: the brightly-lit side (interior with LEDs) appears reflective, while the dark side (exterior viewing position) appears transparent. From outside the box in a dimly-lit room, you see through the film into the infinite reflections. Clean application is critical — bubbles and wrinkles show up as imperfections repeated to infinity.
-
Wire the LEDs with a controller. Connect the LED strips to a controller or Arduino. A simple IR-remote RGB controller gives you color selection, brightness, and basic effects for $3. An Arduino with FastLED library gives you unlimited animation options — slow color fades work best for the infinity effect. Run the power cable out through a small hole in the back, sealed with silicone.
-
Seal every edge against light leaks. This is the step that separates a cool box from a mind-melting experience. Any outside light entering the box creates a bright spot that breaks the infinite illusion. Run black silicone caulk or layers of gaffer tape along every exterior seam, around the viewing panel frame, and over the power cable exit. Test in a dark room — any pinprick of light leak will be obvious.
-
Add hanging elements for extra depth (optional). Suspend small objects inside the box on thin fishing line — crystal beads, tiny LED fairy lights, small mirrored balls. Each object reflects infinitely, adding layers of depth and visual complexity. In the walk-in version, hang LED orbs at different heights from the ceiling for a Kusama-style polka-dot infinity field.
⚠️ Safety Notes
[!WARNING] Mirror glass cuts are nasty. Wear heavy work gloves and safety glasses when cutting and handling mirror glass. Mirror edges are razor-sharp. Tape the edges of cut pieces with masking tape immediately after cutting.
- Walk-in version structural load. Mirrors are heavy. A walk-in room with mirrors on every surface, including the ceiling, carries significant weight overhead. Secure ceiling mirrors with both adhesive and mechanical fasteners (mirror clips or a frame). Test by pushing on them before letting anyone walk underneath.
- Disorientation. The walk-in version can cause genuine vertigo and spatial disorientation, especially with animated LEDs. Warn visitors and don't leave small children unattended inside.
🔗 See Also
- Infinity Mirror Table — same mirror-reflection principle applied to furniture
- Fiber Optic Star Ceiling — another immersive light installation using different tech