#247 — GPS Treasure Hunt Watch
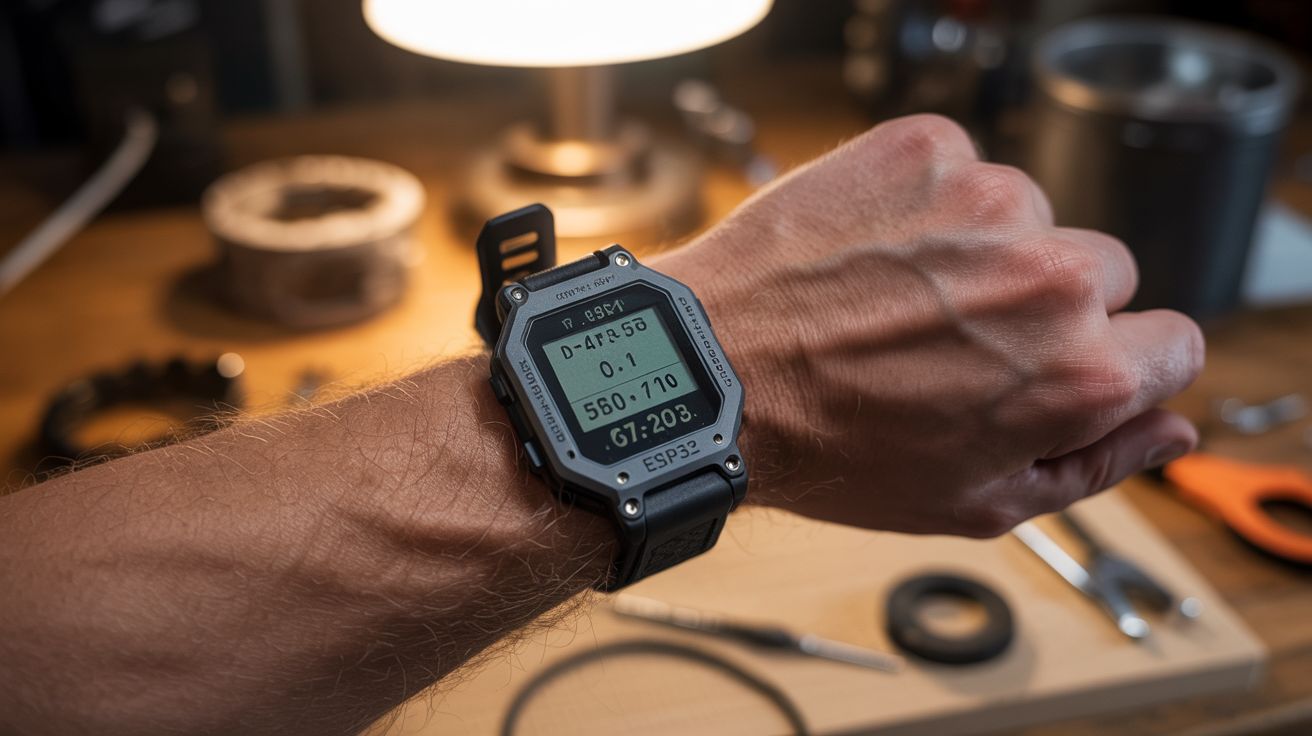
An ESP32 with a GPS module and OLED display strapped to your wrist. Program coordinates, and the watch shows distance and direction to hidden treasures. Geocaching with homemade hardware.
Ratings
🧪 What Is It?
Imagine a watch that doesn’t tell time — it tells you where to go. You program a set of GPS coordinates into it (the location of a hidden cache, a geocache, a surprise party, whatever you want), strap it on your wrist, and the display shows a compass arrow pointing toward the target and the distance remaining. Walk in the direction of the arrow and watch the distance count down. 500 meters... 200 meters... 50 meters... 10 meters... you’re standing on it. It’s like a metal detector for anything you’ve hidden, minus the beeping and the weird looks.
The hardware is remarkably simple. A GPS module (NEO-6M or NEO-7M) receives satellite signals and outputs your current latitude and longitude at 1-second intervals. An ESP32 microcontroller reads the GPS data, computes the bearing and distance to the programmed target coordinates using the Haversine formula (the same math your phone’s map app uses), and renders a compass arrow and distance readout on a 0.96" OLED display. A magnetometer (digital compass module like the HMC5883L or QMC5883L) provides heading information so the arrow points correctly regardless of which way your wrist is facing. The whole thing fits in a 3D-printed or hand-built wristwatch case about the size of a chunky Casio G-Shock.
The applications go way beyond geocaching. Program it with the coordinates of your car in a parking garage. Set up a treasure hunt for kids’ birthday parties with multiple waypoints. Use it for orienteering or hiking to navigate to a specific campsite, trailhead, or water source without relying on your phone’s battery. Because the coordinates are hardcoded (or loaded from an SD card), the watch works anywhere with GPS satellite coverage — no cell service required, no maps to download, no subscription fees. It’s pure satellite navigation distilled into the simplest possible form: which way and how far.
🧰 Ingredients
- ESP32 dev board — small form factor (ESP32-C3 or ESP32-S3 mini) (online, ~$5-8)
- GPS module — NEO-6M or NEO-7M with antenna (online, ~$5-8)
- OLED display — 0.96" SSD1306, 128x64, I2C (online, ~$4)
- Magnetometer — QMC5883L or HMC5883L digital compass module (online, ~$3)
- LiPo battery — 500-800mAh, flat cell for wrist-friendly profile (online, ~$5)
- TP4056 charging module — micro USB LiPo charger (online, ~$1)
- Wrist case — 3D-printed, or modified project box, or a gutted large wristwatch (~$3-5)
- Watch strap — 22-24mm nylon NATO strap or elastic band (existing or ~$3)
- Momentary pushbuttons — 2 small tactile switches for navigation (~$1)
- Slide switch — for power on/off (~$0.50)
- Small perfboard — for connecting modules (~$1)
🔨 Build Steps
-
Test the GPS module on a breadboard. Before building anything into a watch case, wire the GPS module to the ESP32 on a breadboard. Connect TX/RX to ESP32 serial pins (GPIO16/17), VCC to 3.3V, GND to GND. Flash a test sketch that reads NMEA sentences from the GPS and prints latitude/longitude to Serial Monitor. Take the breadboard outside — GPS modules need clear sky visibility for a first fix, which can take 1-5 minutes cold start. Once you see valid coordinates, you know the hardware works.
-
Add the compass. Wire the QMC5883L magnetometer to the ESP32 via I2C (SDA/SCL shared with the OLED). The magnetometer provides heading (0-360 degrees from magnetic north). Test by rotating the breadboard and confirming the heading value changes smoothly. You’ll need to calibrate the magnetometer by rotating it in a full circle in all three axes — the library provides calibration routines that store min/max offsets.
-
Add the display. Wire the OLED display to the same I2C bus. Write firmware that renders a compass arrow in the center of the screen (a simple triangle pointing in the calculated direction) and the distance in large text below it. The bearing to target = atan2 of the coordinate differences; the relative bearing = target bearing minus current heading. Use the Adafruit GFX library for drawing primitives.
-
Implement the navigation math. The Haversine formula calculates the great-circle distance between two GPS coordinates. The bearing formula gives the compass heading from your position to the target. Both are standard formulas available in any GPS library (TinyGPS++ handles both). Subtract your current compass heading from the target bearing to get the relative direction — that’s the angle the arrow points on the display. Update at 1Hz (matching the GPS update rate).
-
Program the waypoints. Hardcode a list of target coordinates in the firmware as an array of lat/lon pairs. Use the two pushbuttons to cycle forward and backward through the waypoint list. Display the current waypoint number and name (if you give them names) along with the distance and direction. For more flexibility, store waypoints on an SD card as a simple CSV file that the ESP32 reads at boot.
-
Build the watch case. This is the mechanical challenge. Everything — ESP32, GPS module (with antenna facing up through the case), magnetometer, OLED, battery, and charging board — needs to fit in a wrist-wearable case. A 3D-printed case is ideal: design it with a flat bottom, a window for the OLED, cutouts for the buttons and charging port, and a thin top wall over the GPS antenna (plastic is RF-transparent; metal is not). If no 3D printer, use a small project box filed down to size, or gut a large digital wristwatch and rebuild the internals.
-
Assemble the watch. Stack the components: battery on the bottom (closest to wrist), perfboard with ESP32 and modules in the middle, OLED on top facing through the display window. Hot-glue everything in place but leave the TP4056 USB port accessible for charging. Attach the NATO strap or elastic band to the case using spring bars or simple loops. The finished watch should be bulky but wearable — think chunky outdoor watch, not elegant dress watch.
-
Field test. Program the coordinates of a known location (your mailbox, a park bench, a specific tree) and walk to it using only the watch. The arrow should smoothly rotate to point toward the target as you change direction. The distance should count down steadily as you approach. At very close range (under 10 meters), GPS accuracy becomes the limiting factor — the displayed distance will jump around by 3-5 meters. Add a “you’re here!” screen that triggers when distance drops below 10 meters.
⚠️ Safety Notes
- GPS modules consume significant power during satellite acquisition. Battery life is typically 4-8 hours with a 500mAh LiPo, depending on display brightness and GPS update rate. Carry a backup navigation method (phone, map) on hikes where getting lost would be dangerous.
- GPS accuracy is 3-5 meters in open sky and degrades significantly under tree canopy, in urban canyons, or indoors. Don’t rely on this for navigation precision better than about 10 meters.
- The LiPo battery should not be exposed to extreme heat (above 60°C) or punctured. Don’t leave the watch on a car dashboard in summer.
- The magnetometer is affected by nearby magnetic fields — large metal objects, speakers, other electronics. Calibrate outdoors away from metal structures for best accuracy. Wrist-mounted magnets (like some watch clasps) will completely throw off the compass.
- This device is not a substitute for proper navigation equipment in wilderness or emergency situations. It’s a fun tool, not a safety device.